Task Management
Guide to configure Tasks
Overview
Tasks feature in Chakra a a logged record of a specific to-do item, assignment, or action that needs to be completed or has already been done for a lead, ticket or deal.
Type of Tasks
- Manual Scheduled Tasks
- Auto Scheduled Tasks
- Mapped Tasks to Process (Lead, Ticket, etc.)
Key Components of a Task Configuration
- Task Form
- State Mapping
- Task Visibility to Roles
- Task Attributes
- Task Forms
- Task Lifecycle Rules
How can User use the Task feature?
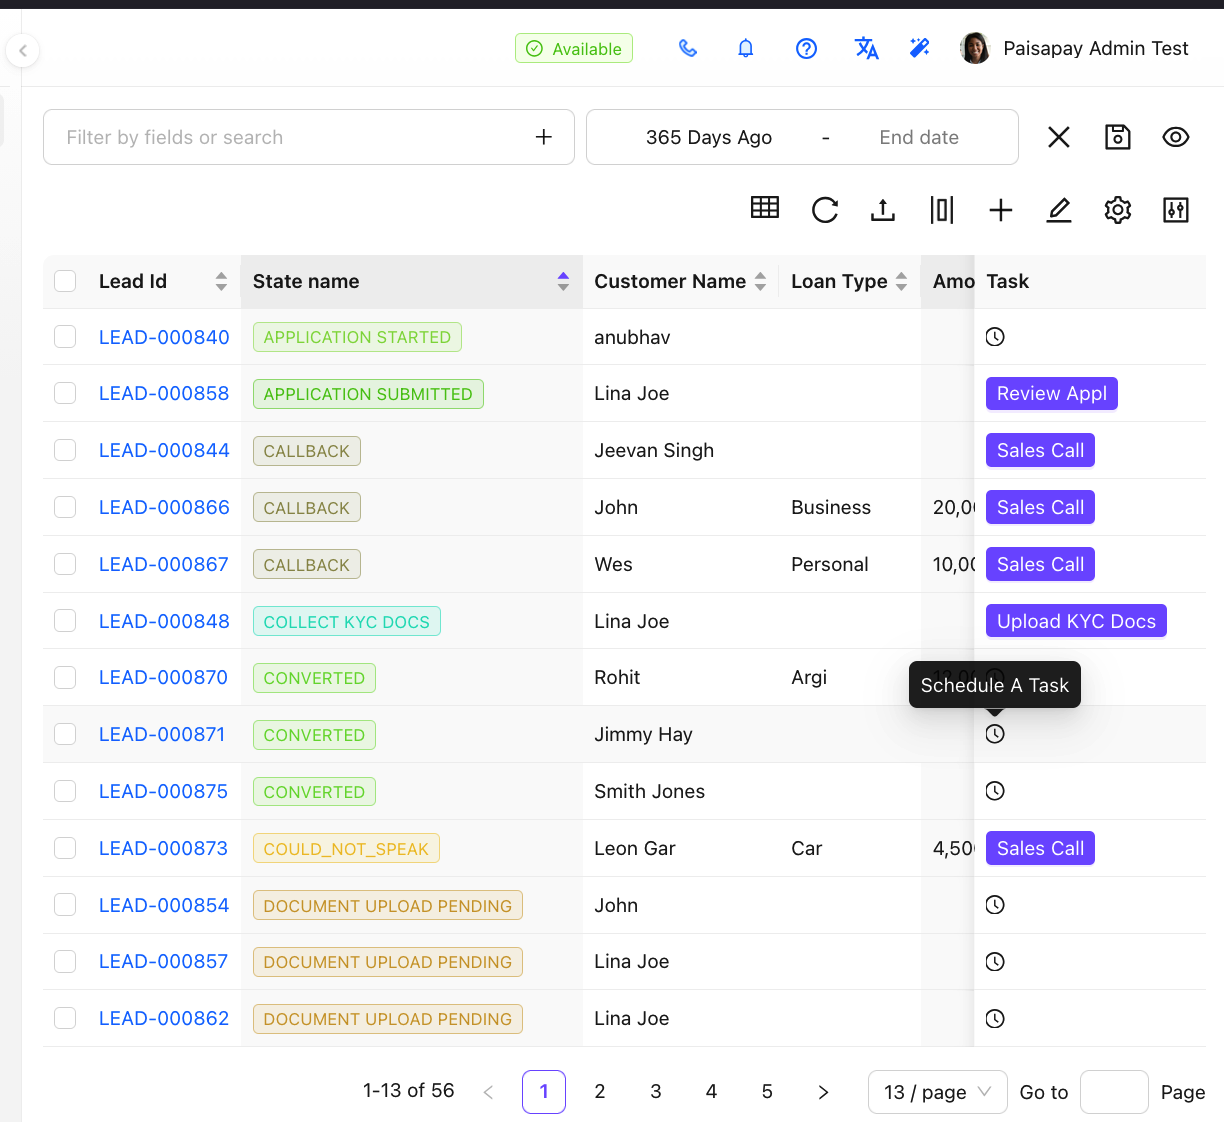
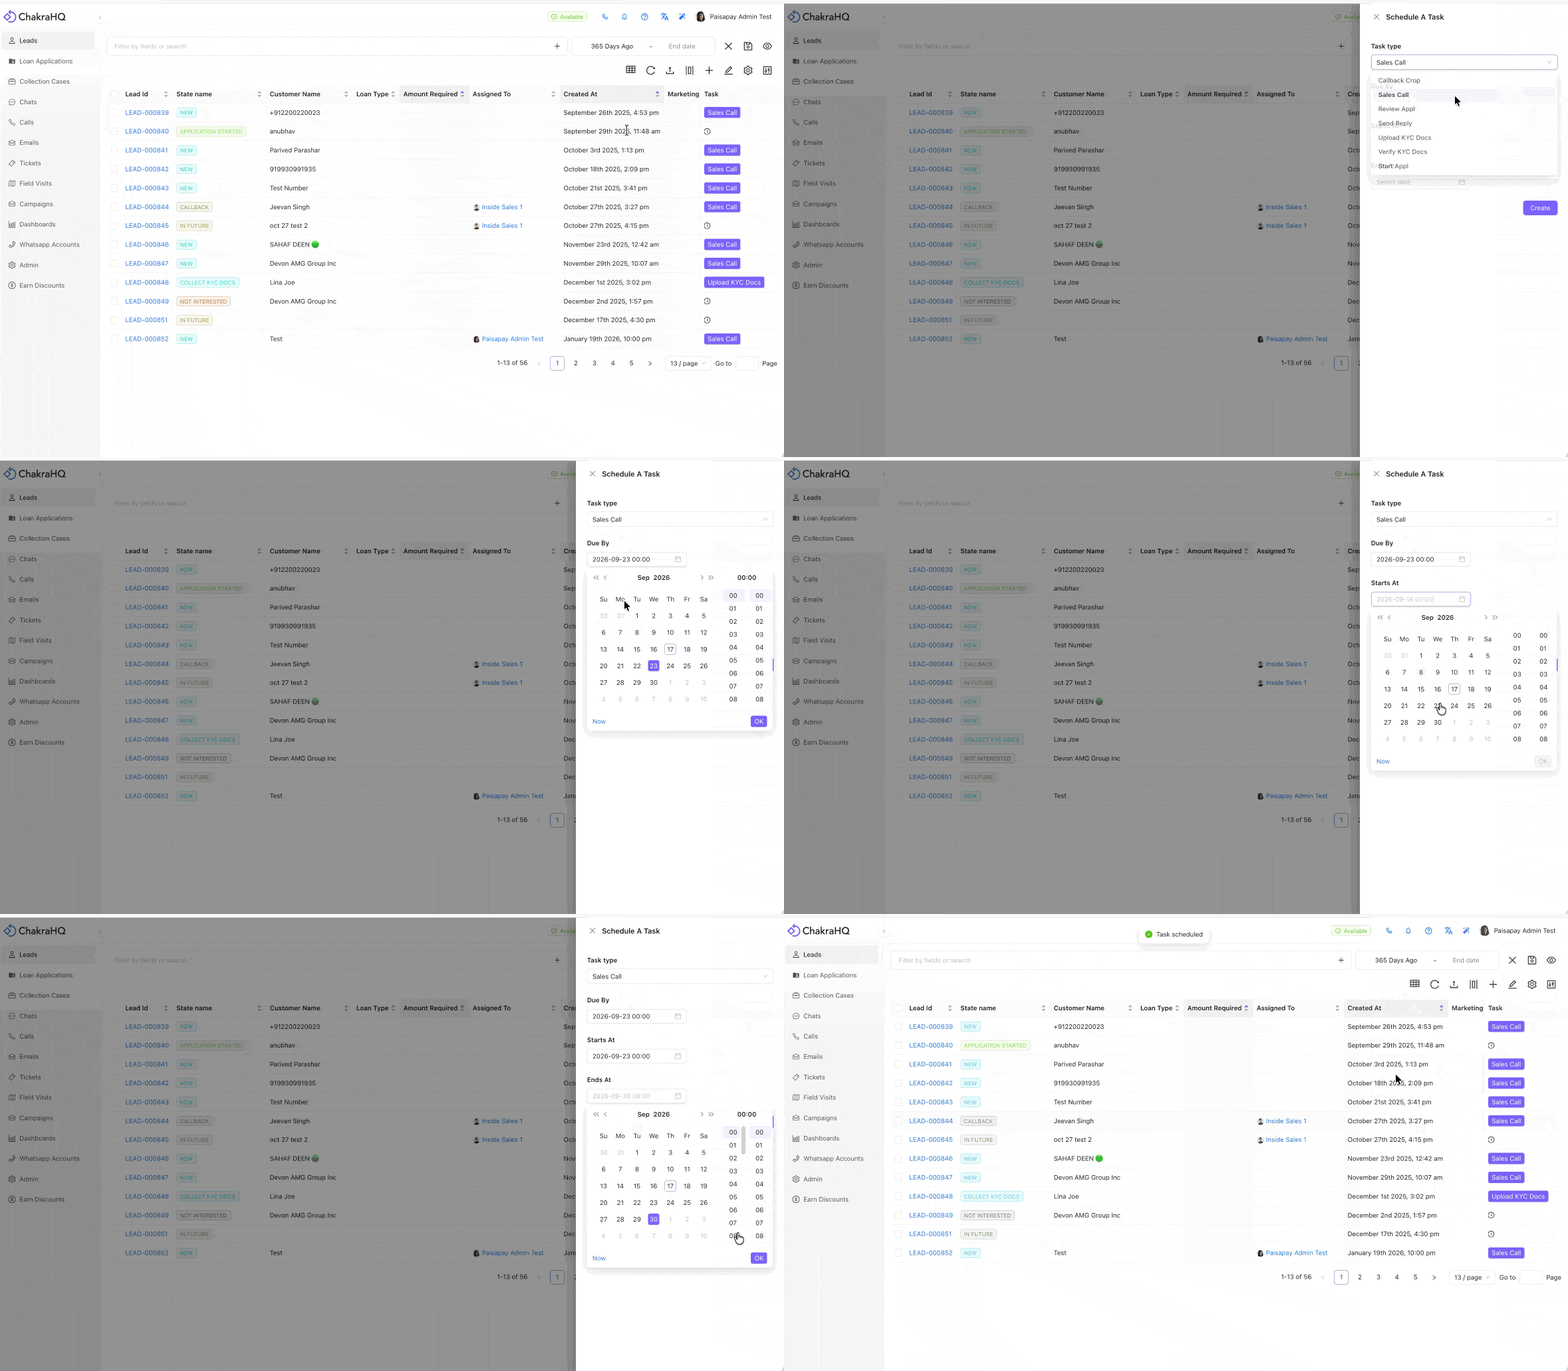
Schedule a Manual Task
- Click on Schedule a Task in the Task Panel in the Process (Lead) List
- Choose a Task from the list
- Add a Task Due By Time
- Add a Task Starts At Time
- Add a Task Ends At Time
- Click on Create to Schedule the Task
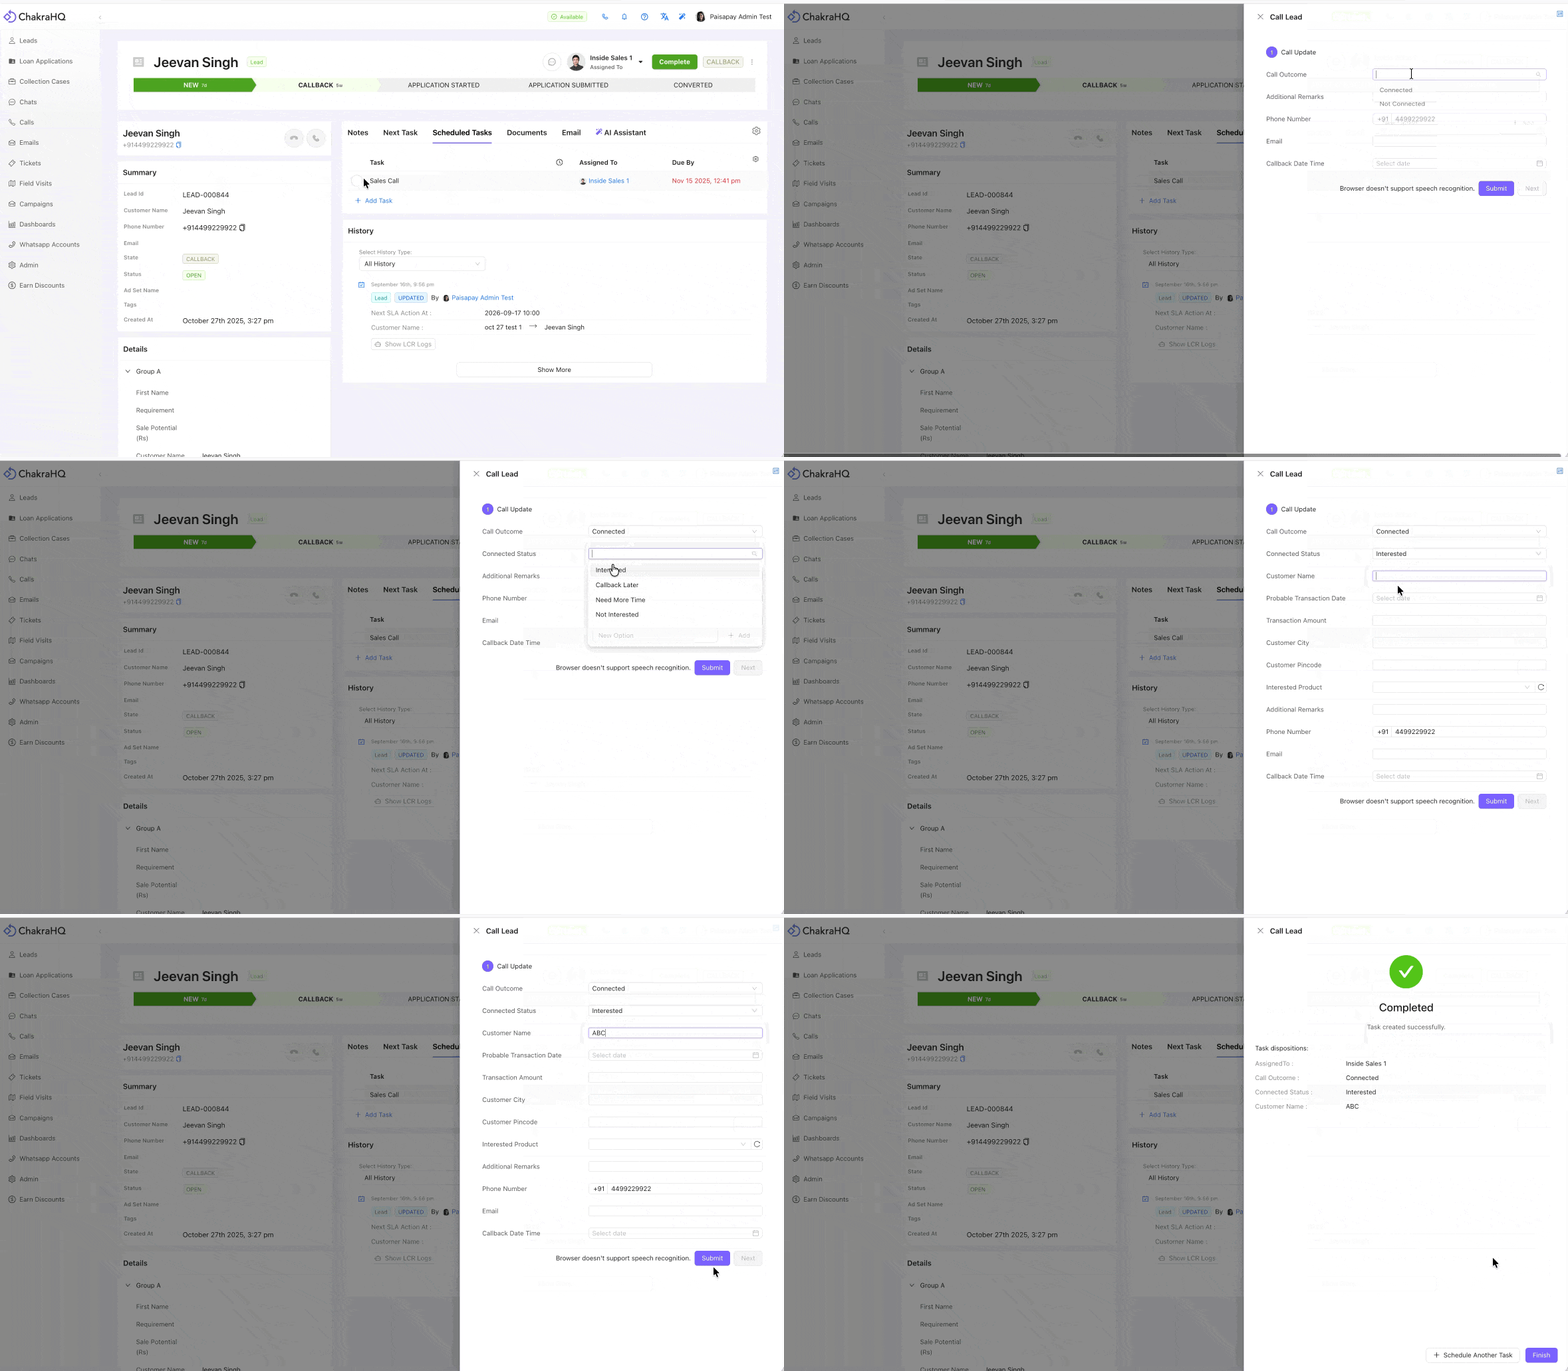
Log Scheduled Tasks
To log scheduled tasks either manually or auto scheduled
- Go to Lead Details Page
- Navigate to the Scheduled Tasks Tab in the Activity Section
- Click on the Scheduled Task to log
- This opens a Task form in the right drawer
- Fill the Task form field and click
Submit - The Task is now logged in Chakra
Log State-mapped Tasks
To log state-mapped tasks
- Go to the Process Dashboard
- Navigate to the Task Panel
- Click on the task against the Lead to be updated
- This opens a Task form in the right drawer
- Fill the Task form field and click
Submit - The Task is now logged in Chakra
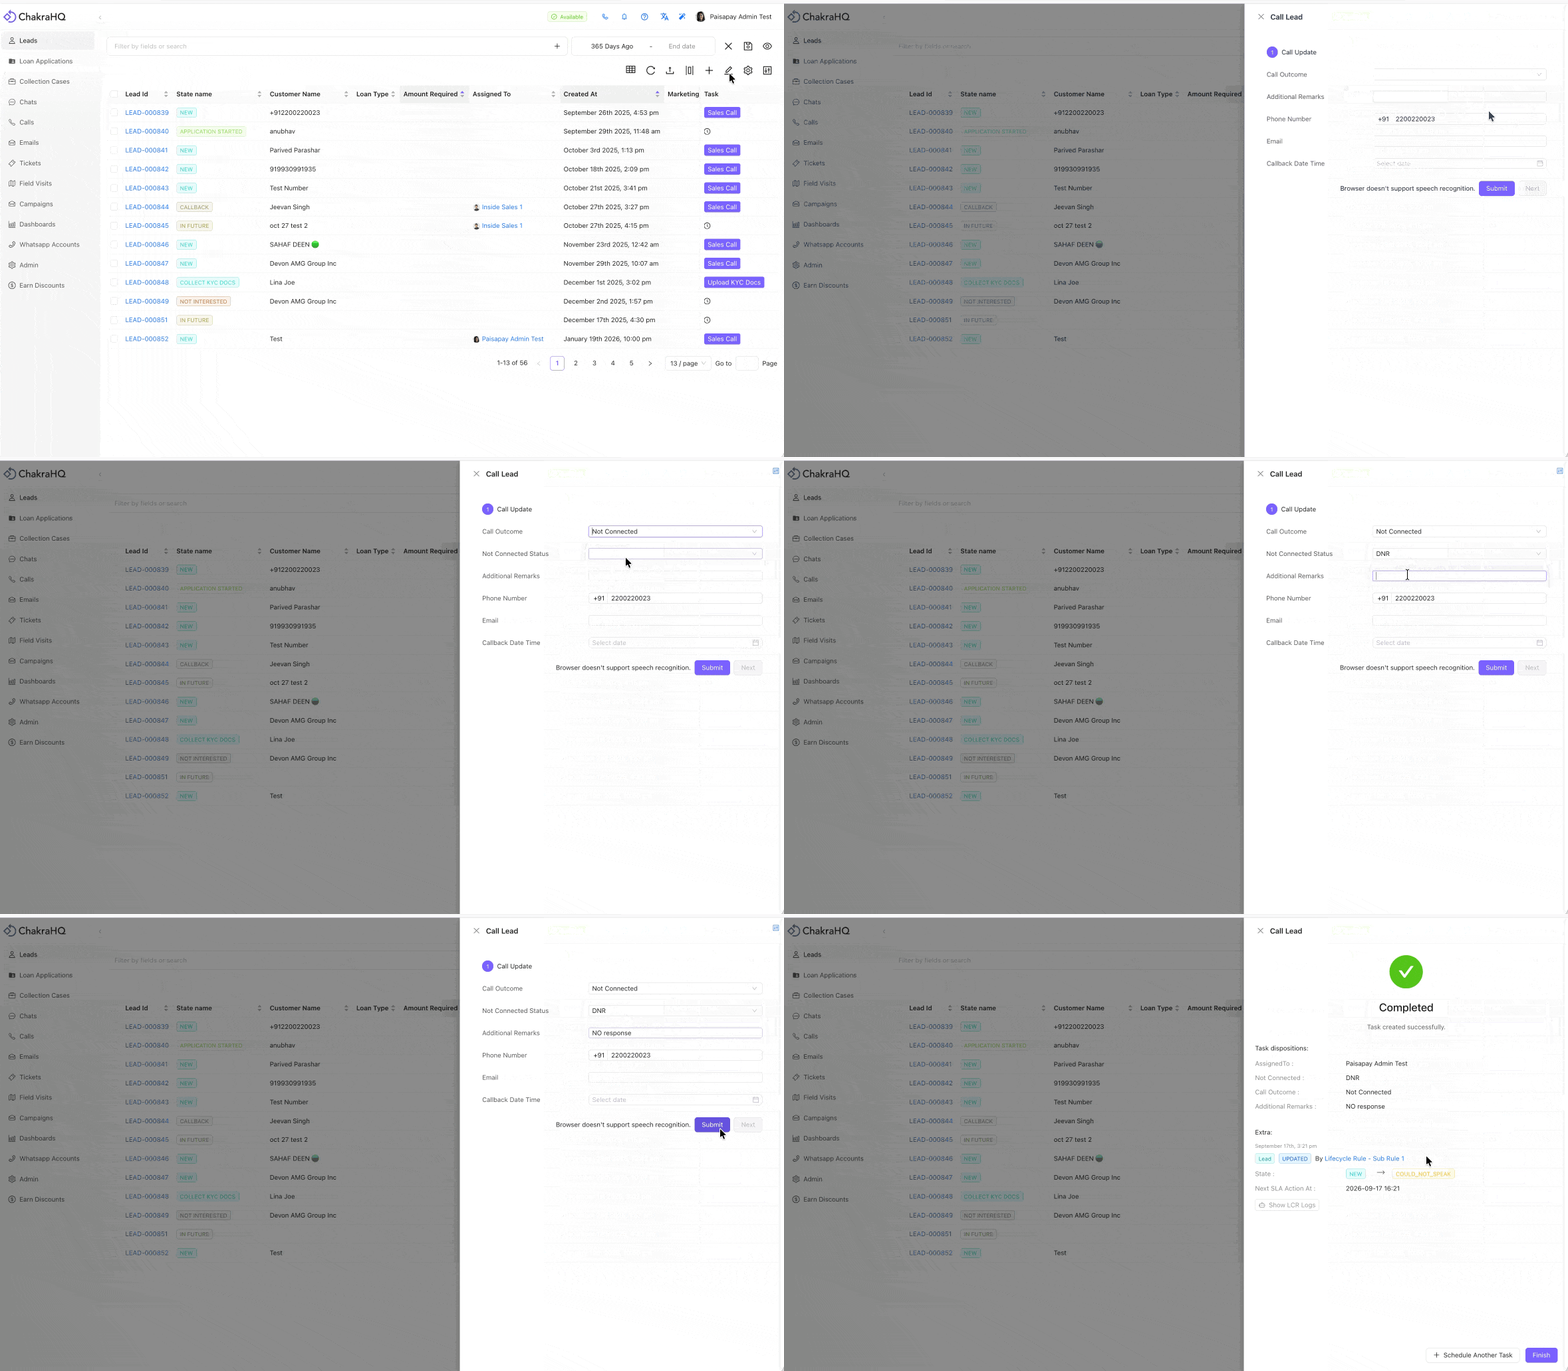
How to Create a Task
- Go to Admin. Select the process (e.g. Lead, Ticket).
- Navigate to Task in the inner nav-bar
- Click on
+ Add Task - A new Task creation form opens up in the right drawer
- Add Task title
- Add task short code
- Add Task attributes (optional)
- Add Task Mapping (optional, for state mapped tasks only)
- Add an Order number (optional)
How to Configure a Task
To configure advanced task configurations
Details
The following setup can be configured in the Task details section
- State Mappings: This task will show up when the process has one of the following states. If no states are mapped then the task will always be available to the user.
- Visible to Roles: This task will only be visible to roles selected below. If no roles are selected, the task will be visible to all roles.
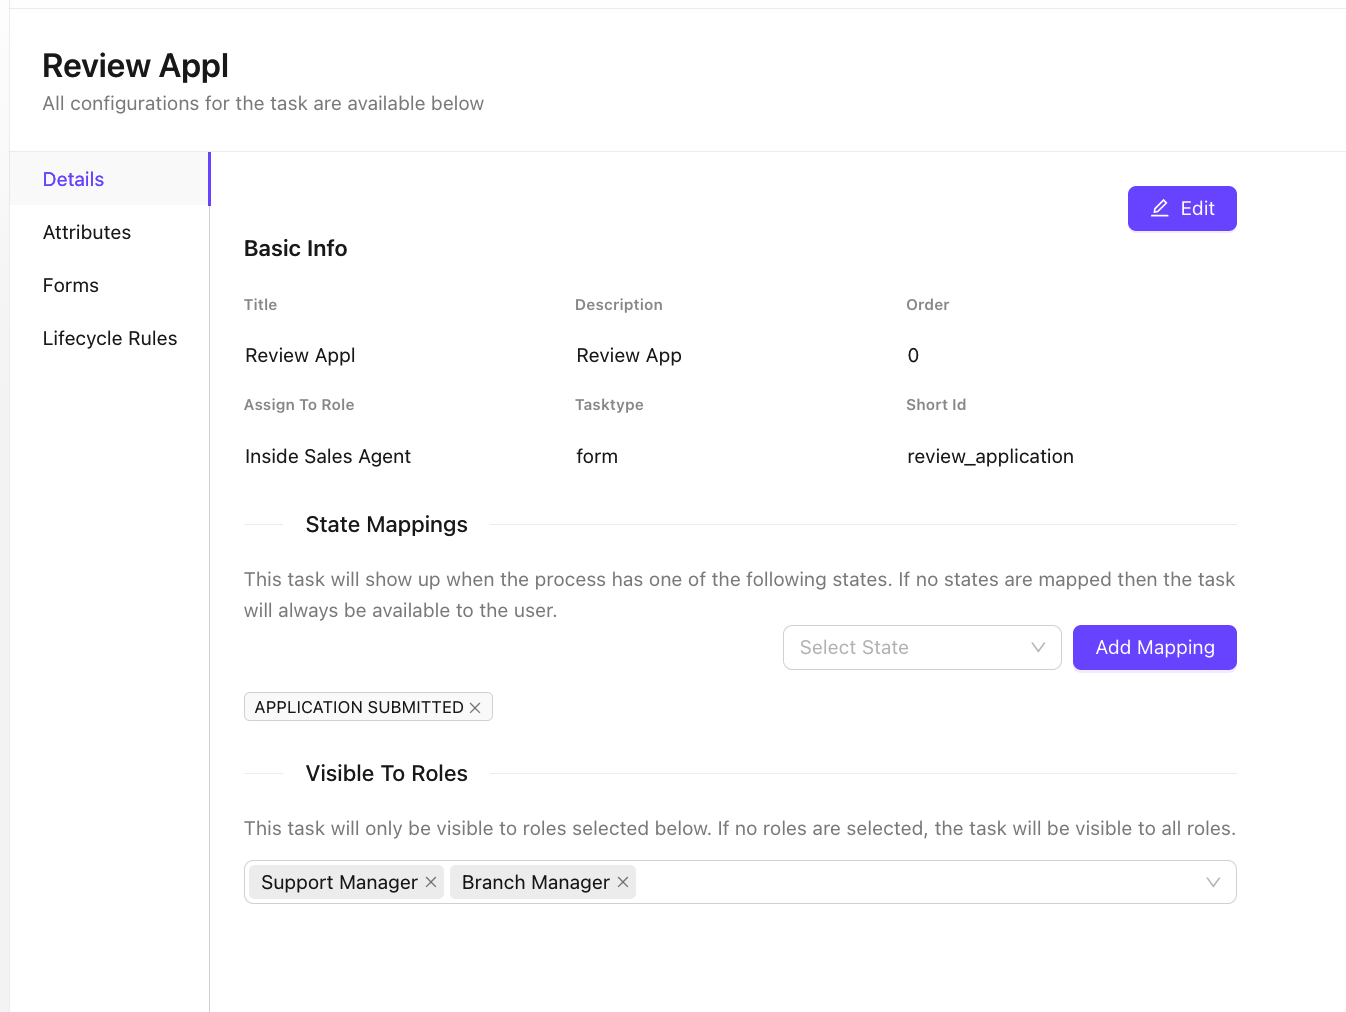
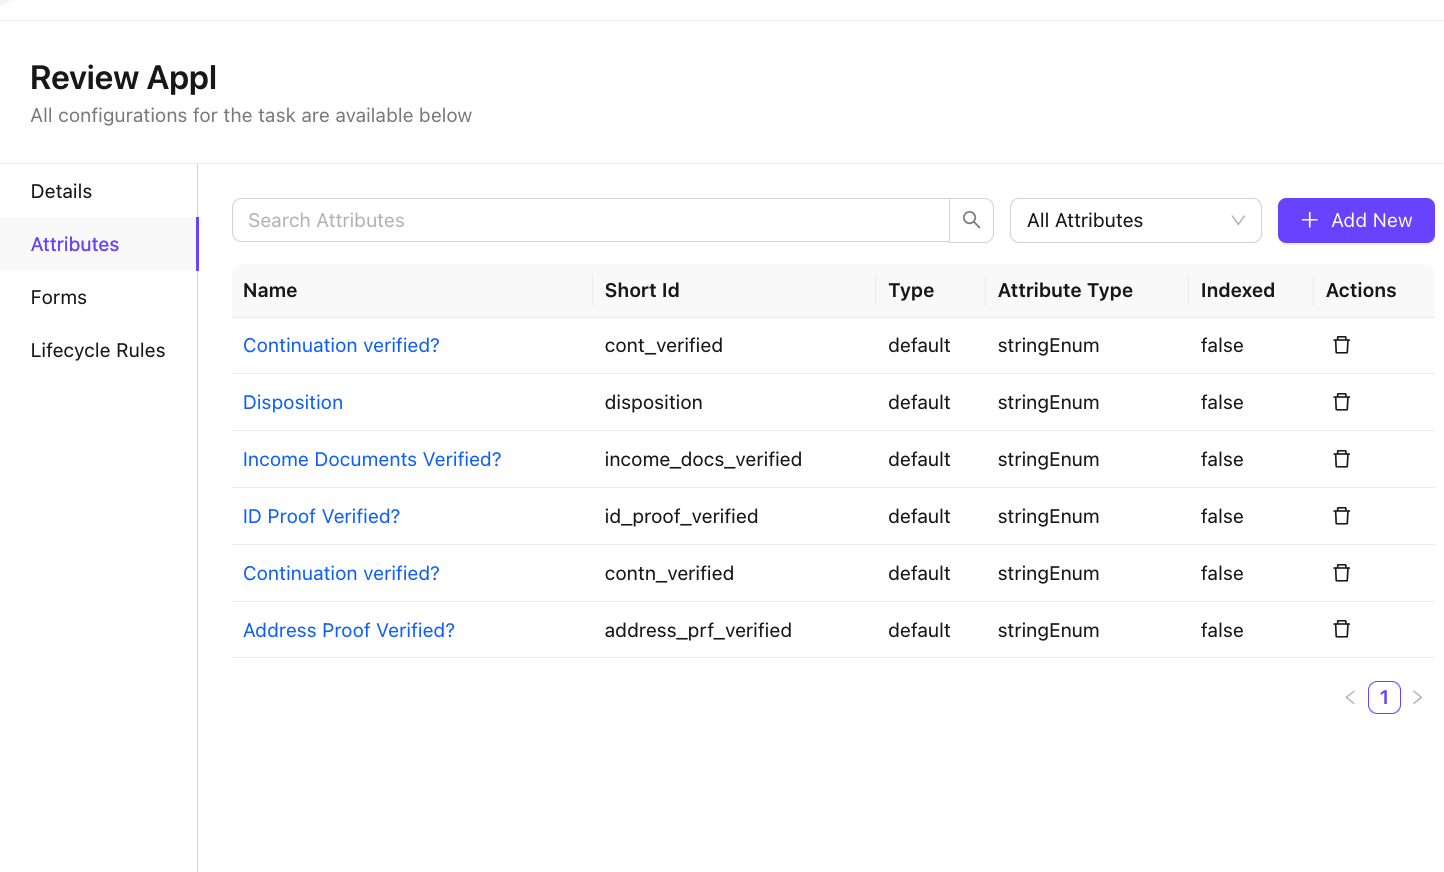
Attributes
Create and Manage Attributes to use in the Task forms.
- Add an Attribute
- Add Attribute options
- Manage Attributes
- Modify or delete attributes
The steps to create Task attribute is same as lead attribute. Follow this guide to know more.
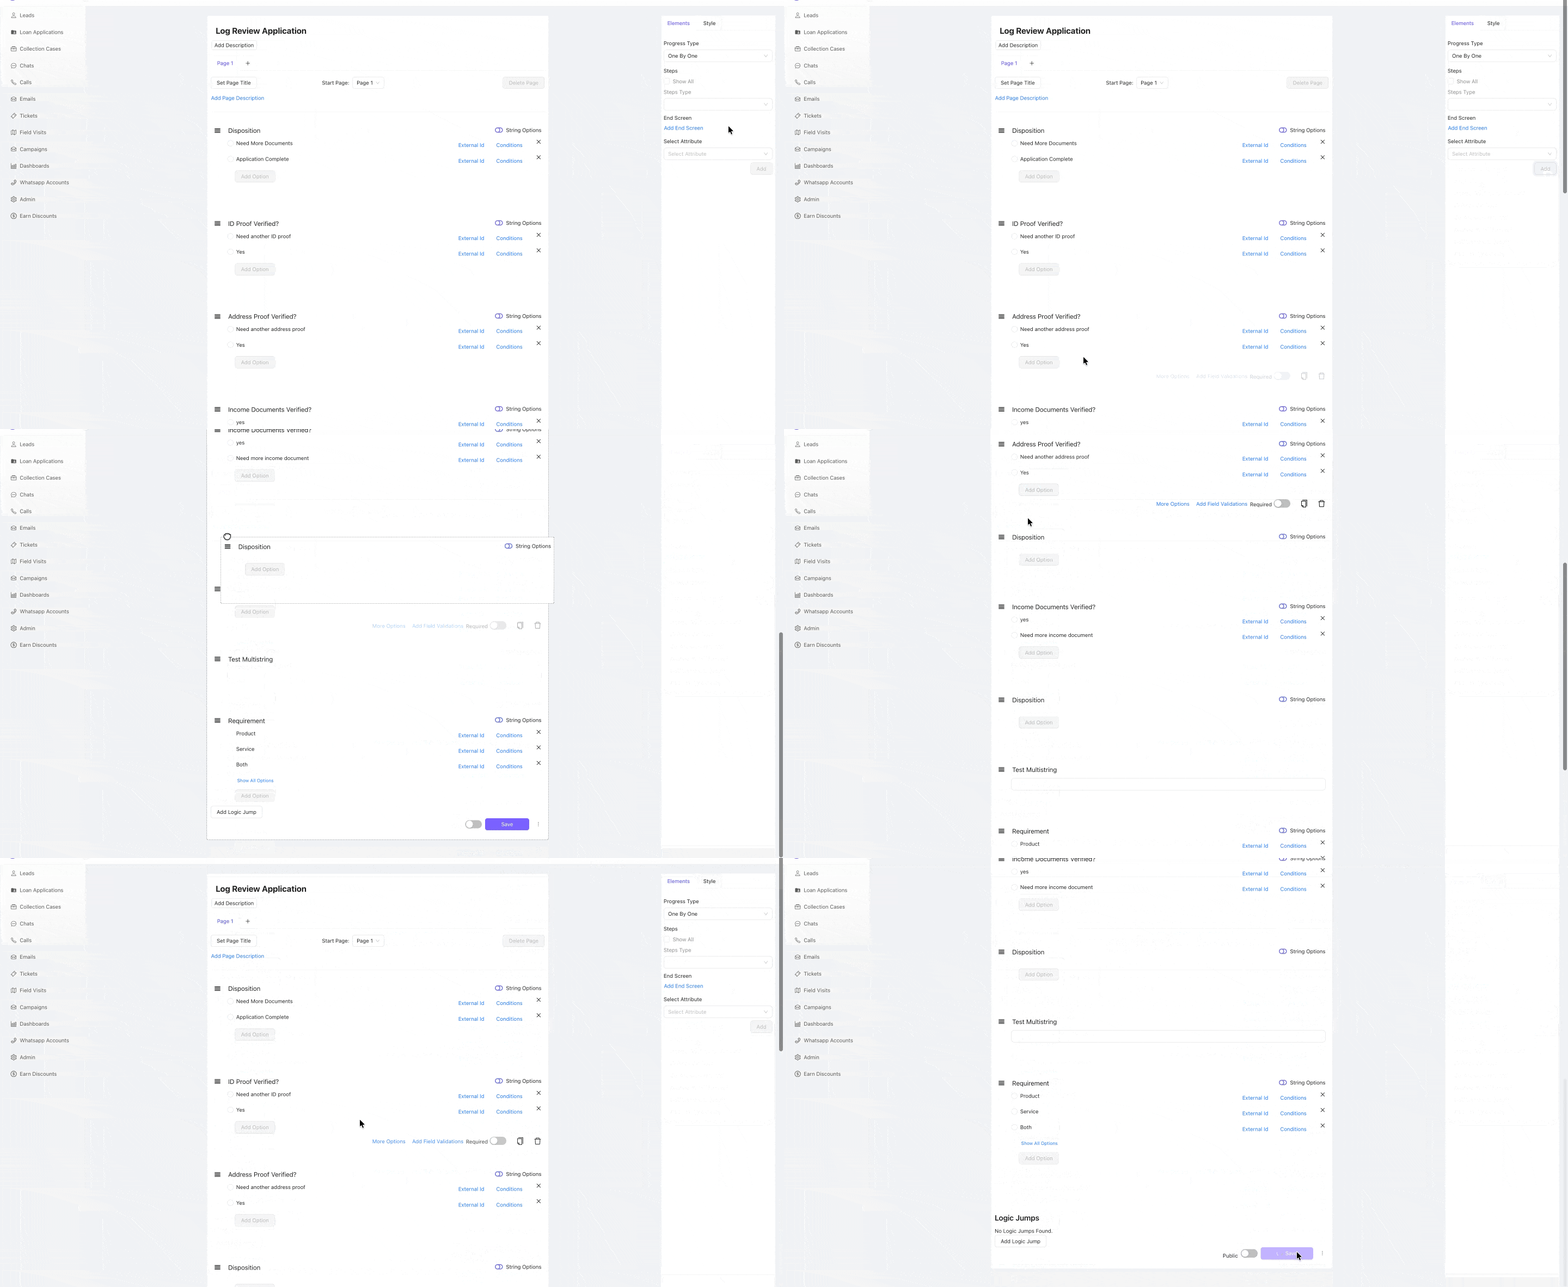
Forms
Once a task is created, a default set of forms are generated. Log Task Form and Complete Task Form.
To configure the form
- Navigate to the Log [Task Name] form
- Add Attributes in the form using the
Select Attributeon the right side panel. The task attributed are picked from the task attributed created and all the lead attributes (this will have a tag). - Click
Add
- Click
- Order the Task attribute in the form using the ☰ to drag and drop
- Click on
Saveto save the task form
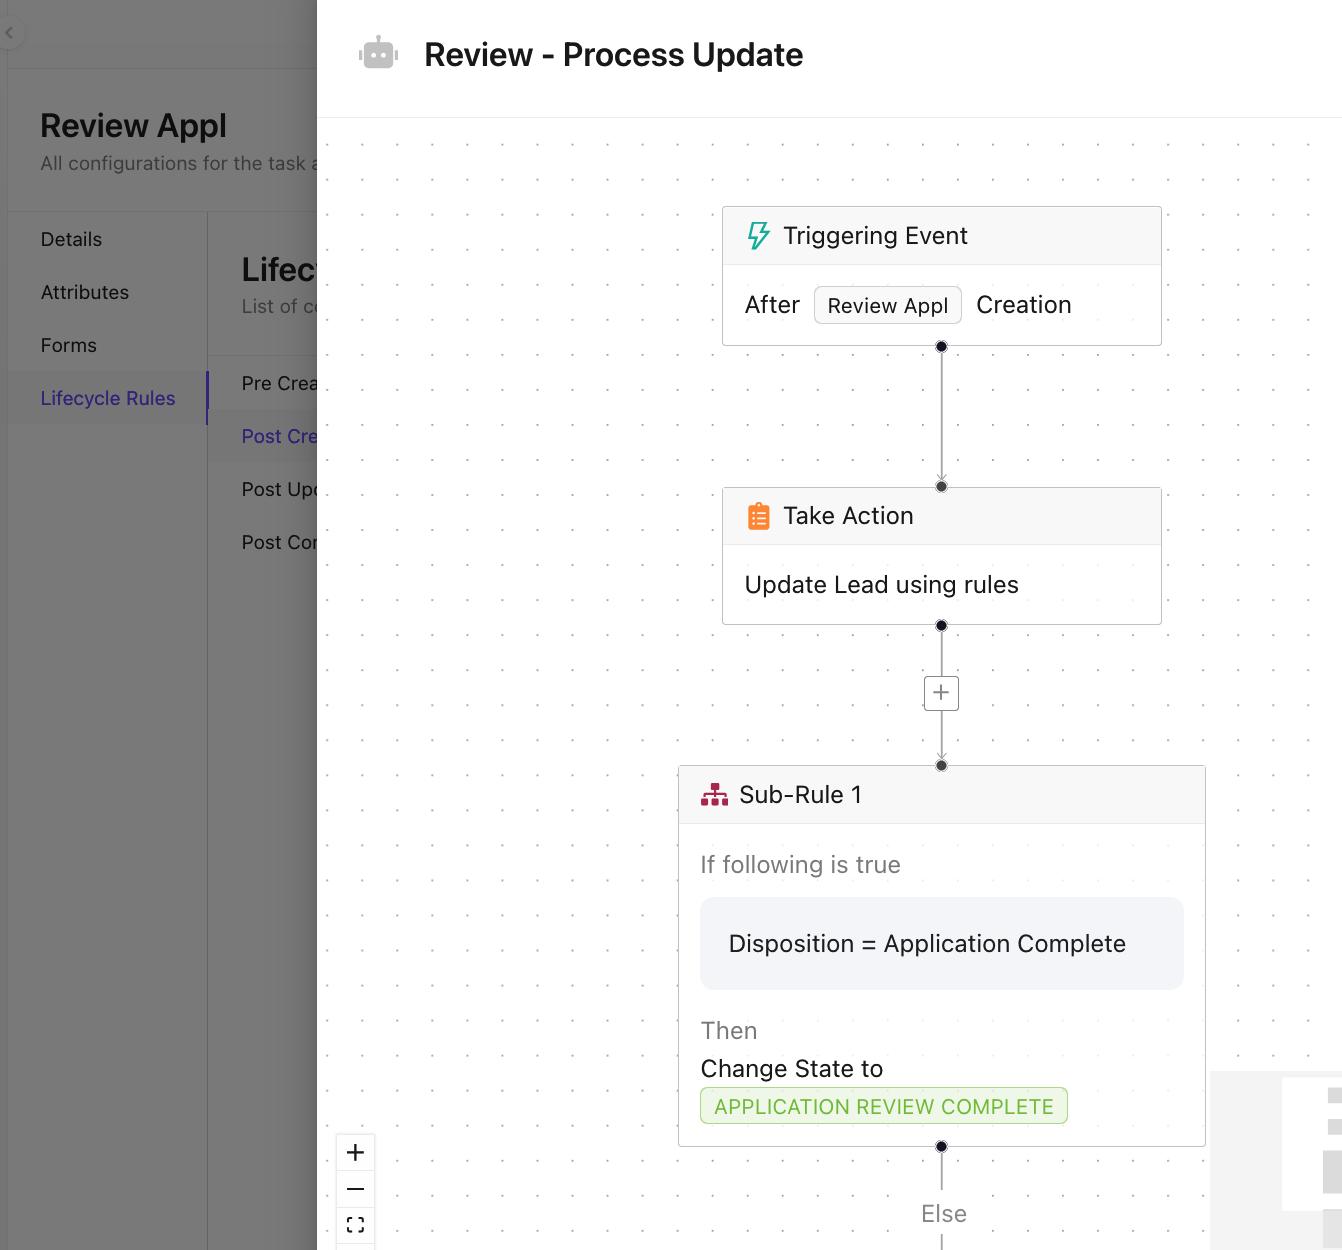
Lifecycle Rules
Lifecycle rules in tasks are used to trigger automated events and actions based on Task actions
The lifecycle configuration is similar to lead lifecycle rules. Use the following guide.
For e.g. to Change the state of a Lead, once a task is completed
- Go to Lifecycle Rules tab
- Choose Post Creation (post task logging)
- Add a New rule using
Addbutton - Use the lifecycle rule help guide , complete all LCR configuration