How to connect n8n AI Agent to WhatsApp
Use Chakra Chat to connect your n8n AI bot or Agent to WhatsApp. Using Chakra webhooks, you can seamlessly integrate your AI agent to engage your customer on WhatsApp.
In this article, we will explore how to connect an n8n AI Bot or agent to WhatsApp. For this, we will use WhatsApp APIs and webhooks provided by Chakra Chat.
At the end of this, you should be able to have a full n8n chat agent responding to queries from users on your Cloud Connected WhatsApp Number.
Pre-Requisites
A) We will assume that you already have an n8n cloud account or have n8n hosted somewhere that is accessible to the public internet.
B) It is also required that you have a Chakra Chat account and have already connected WhatsApp. If not, please follow the steps below
Also note that this bot can be created with a Free Chakra Chat account. 🎉
C) You will also need an OpenAI account and an OpenAI key, as we will use OpenAI as our AI provider. You can sign up for an OpenAI developer account from this page
Step 1. Set up a webhook trigger on n8n
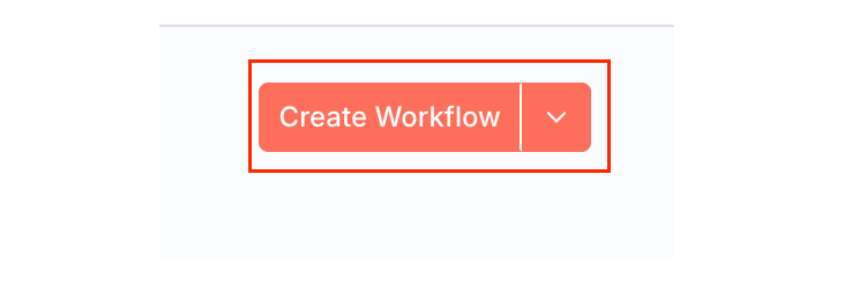
1.1 First, log in to your n8n account and create a new workflow by clicking the "Create Workflow" button in the top right corner of the main n8n dashboard
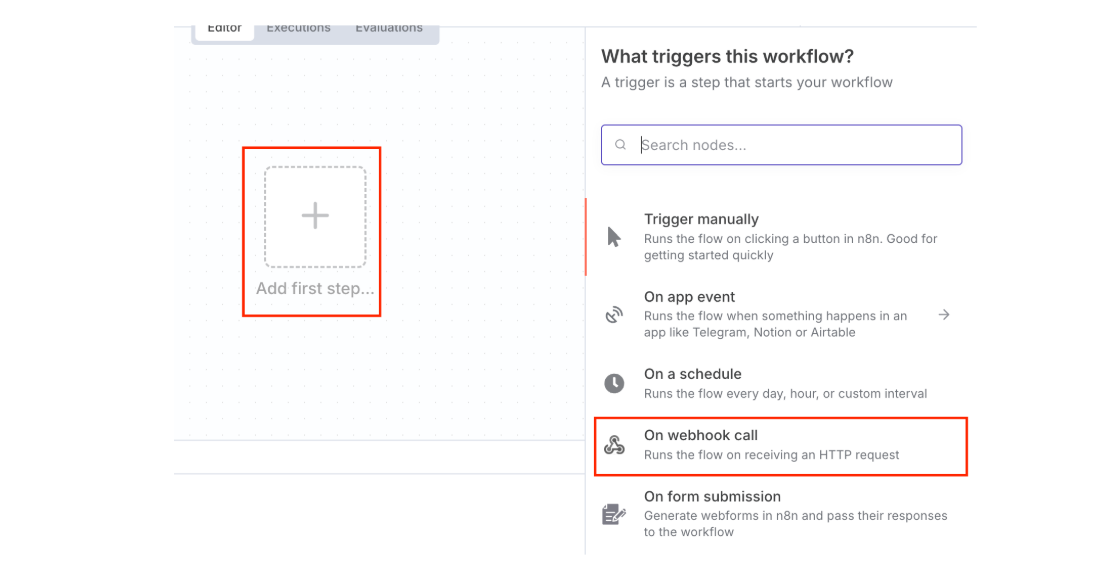
1.2 Click "Add First Step" node and select the "On webhook call" trigger
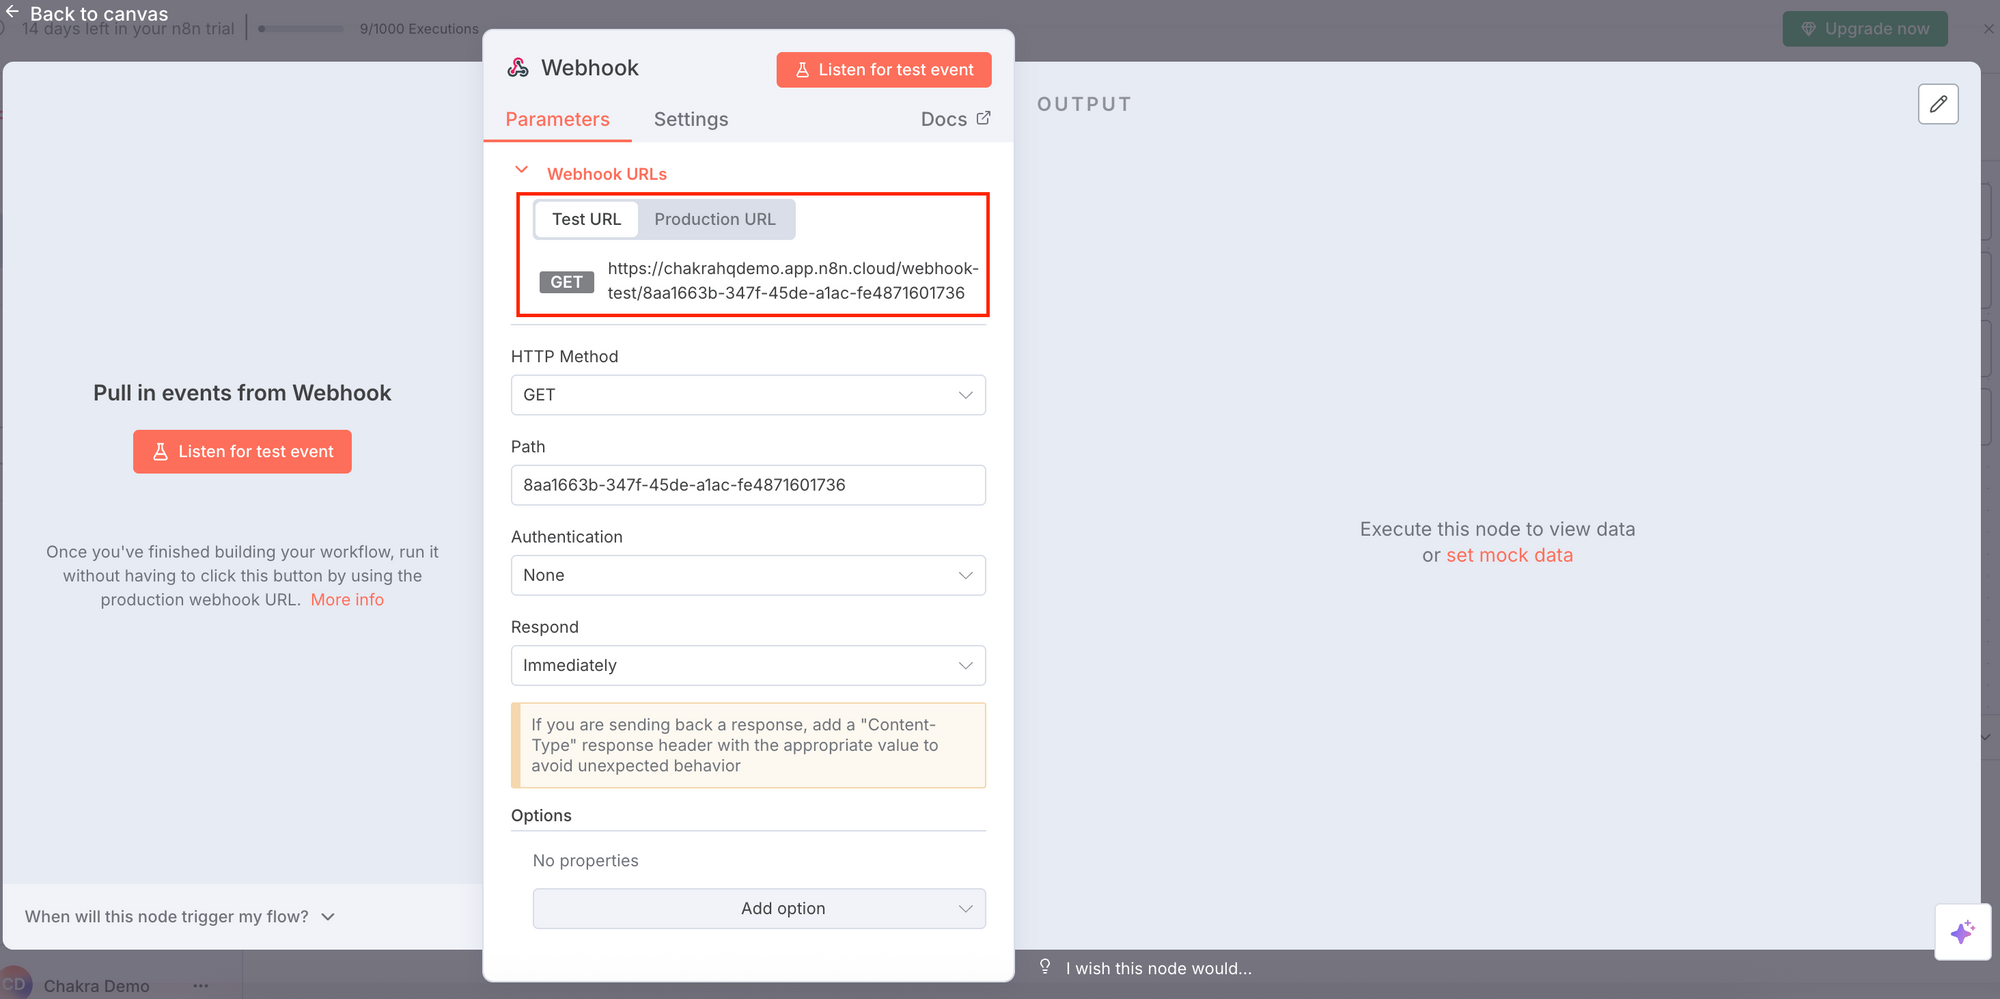
1.3 Configure the test webhook URL on ChakraHQ
1.3.1 The webhook trigger configuration page should be open now. Click the test webhook URL to copy it to your clipboard
1.3.2 Open your Chakra Chat account and go to the WhatsApp Setup page, and click the More tab
1.3.3 Scroll down and click the toggle under "Enable pass-through webhook."
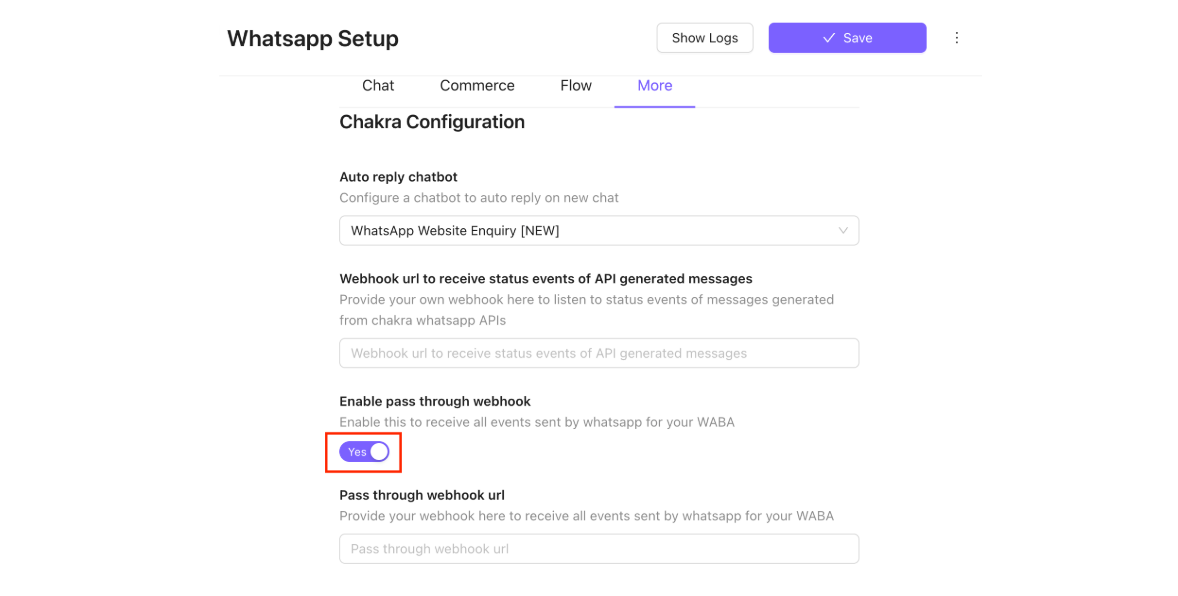
1.3.4 Paste the copied n8n test webhook URL into the input box under "Pass through webhook URL"

1.3.5 Click the Save button in the top right corner of the WhatsApp setup page to finally save the configuration
1.4 Ok. Excellent! Now we will test our integration.
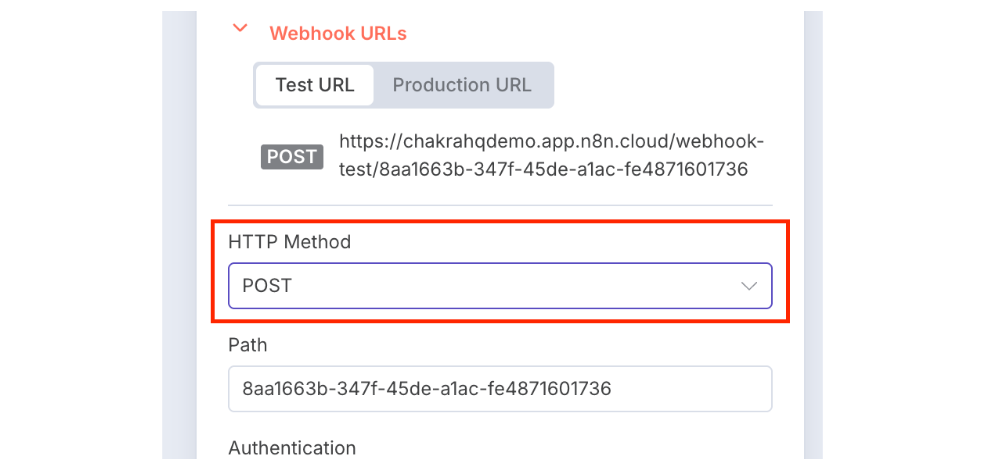
1.4.1 Switch back to n8n and change the trigger HTTP Method to POST from the webhook configuration page
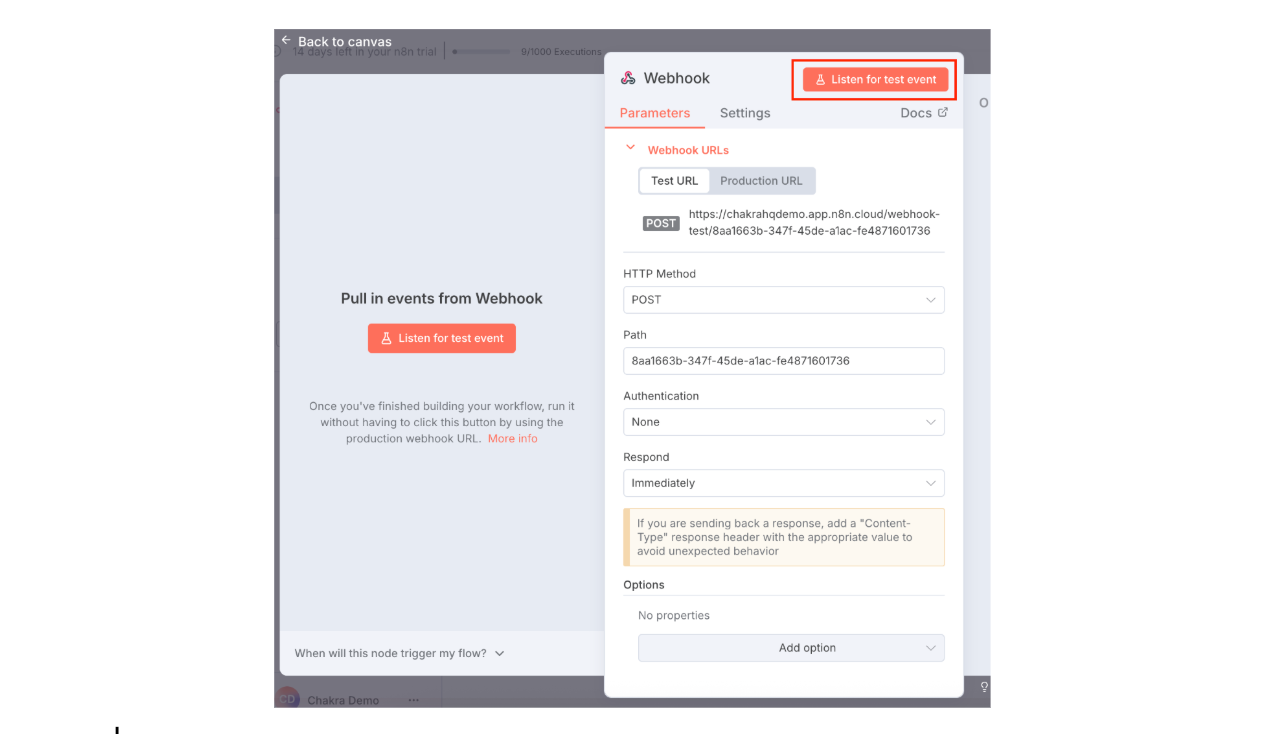
1.4.2 Click the "Listen for test event" button
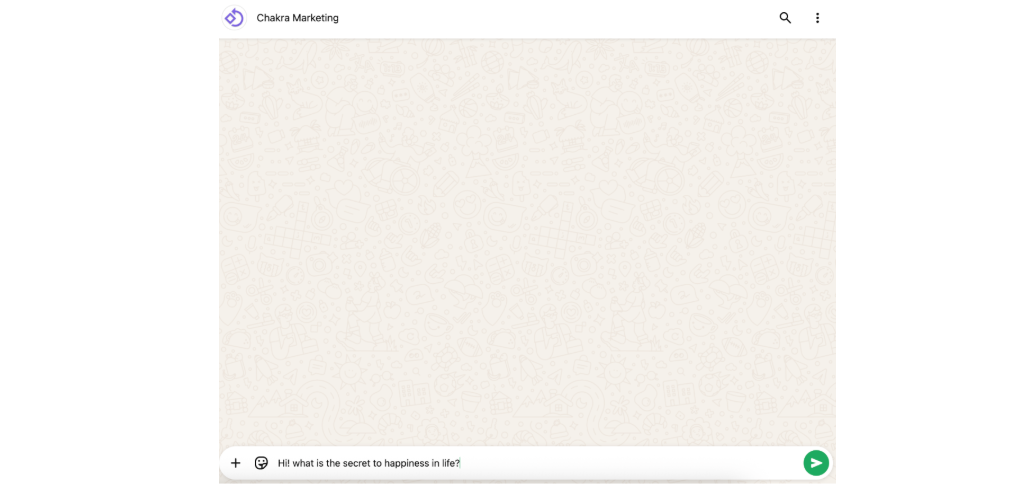
1.4.3 We need to send a message to the WhatsApp number from another end user's WhatsApp number, so that a test webhook event is generated
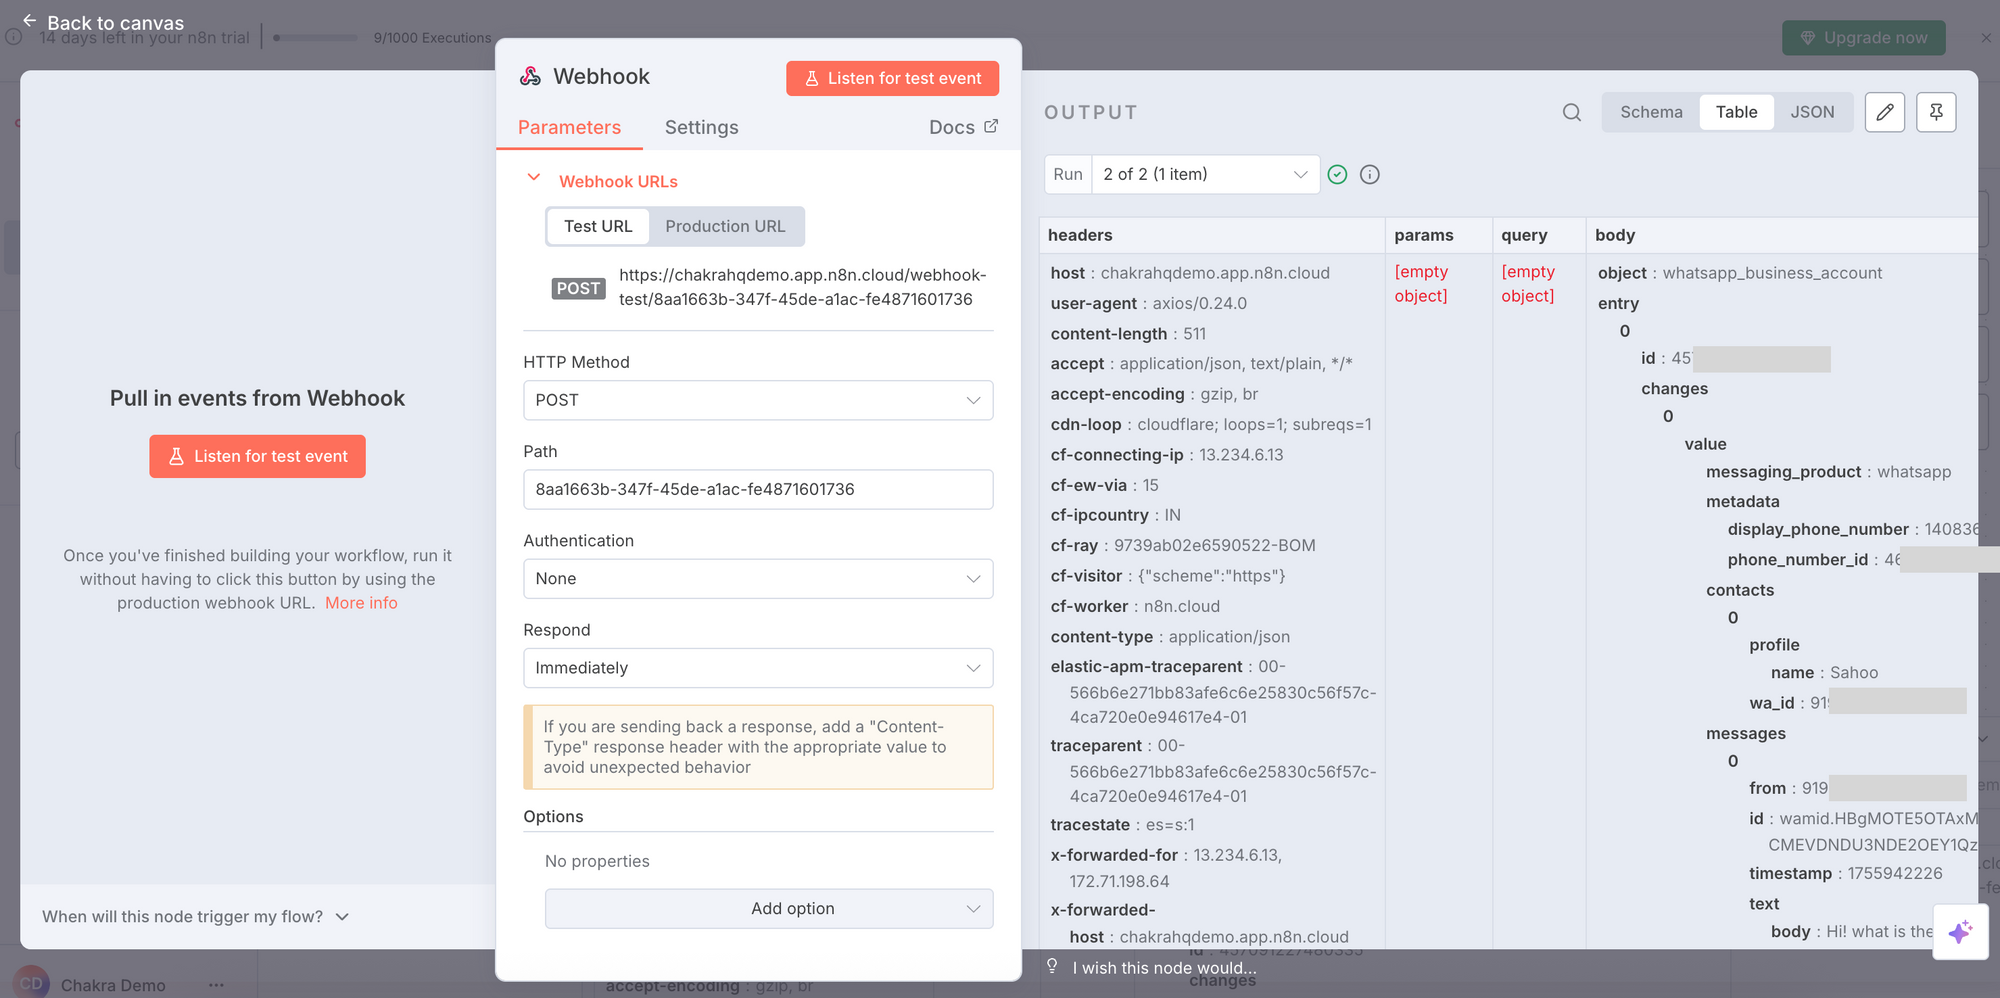
1.4.4 On the n8n trigger config page, you should now see the webhook event corresponding to the message you just sent, like the following screenshot. If you do not see any event, please review all the earlier steps and verify your setup
1.4.5 Ok, now we are ready to configure an AI Agent, so click "Back to Canvas" and quickly save all the progress of your workflow so far.
Step 2. Set up an AI Agent
We will set up an OpenAI AI agent on n8n now.
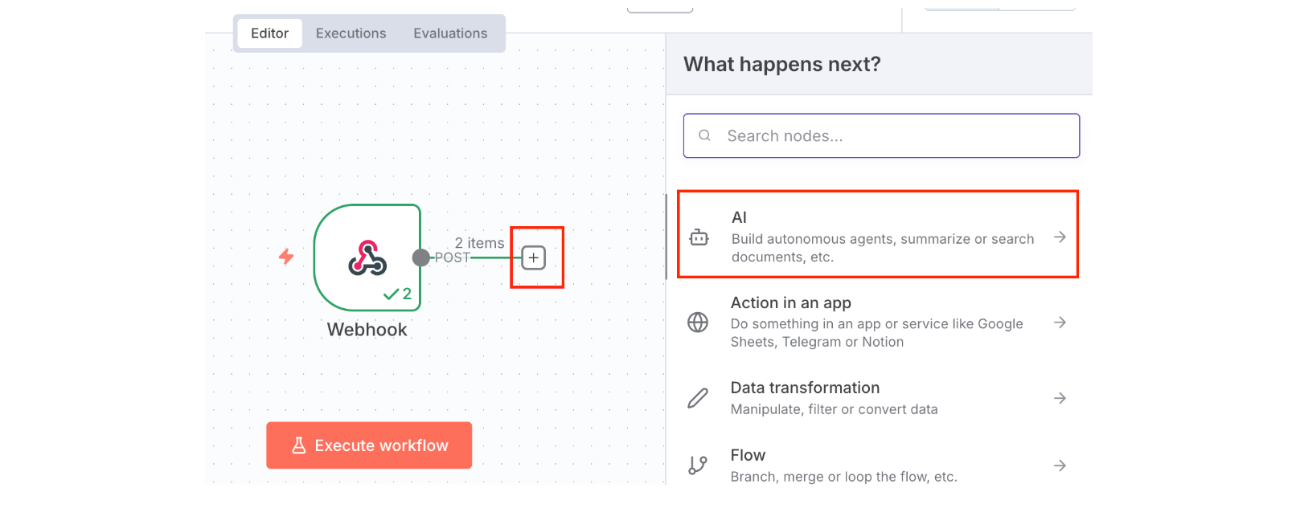
2.1 Click the plus button next to the webhook trigger in the n8n workflow editor. A drawer should open up on the right with node options. Click "AI" to show all AI Node options
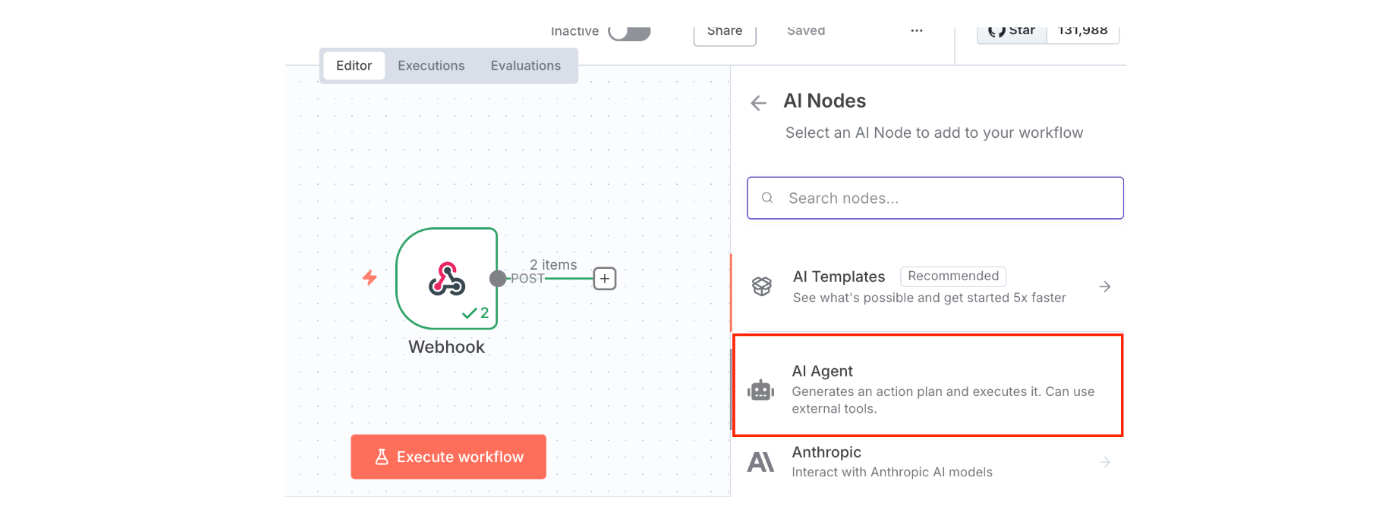
2.2 Click the AI Agent to select and add an AI Agent node
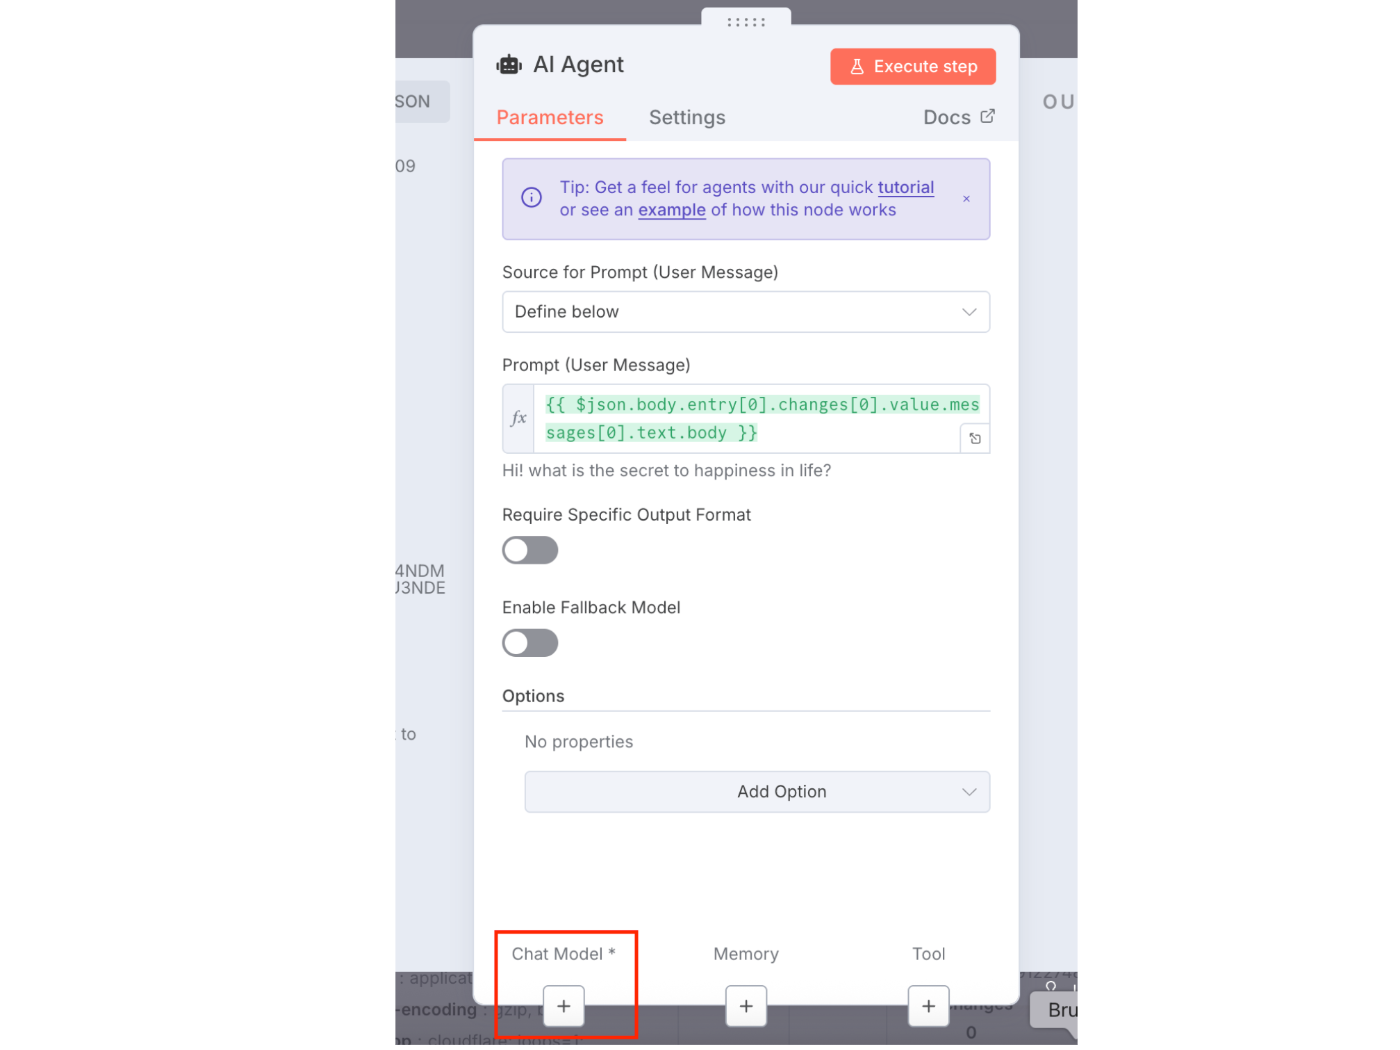
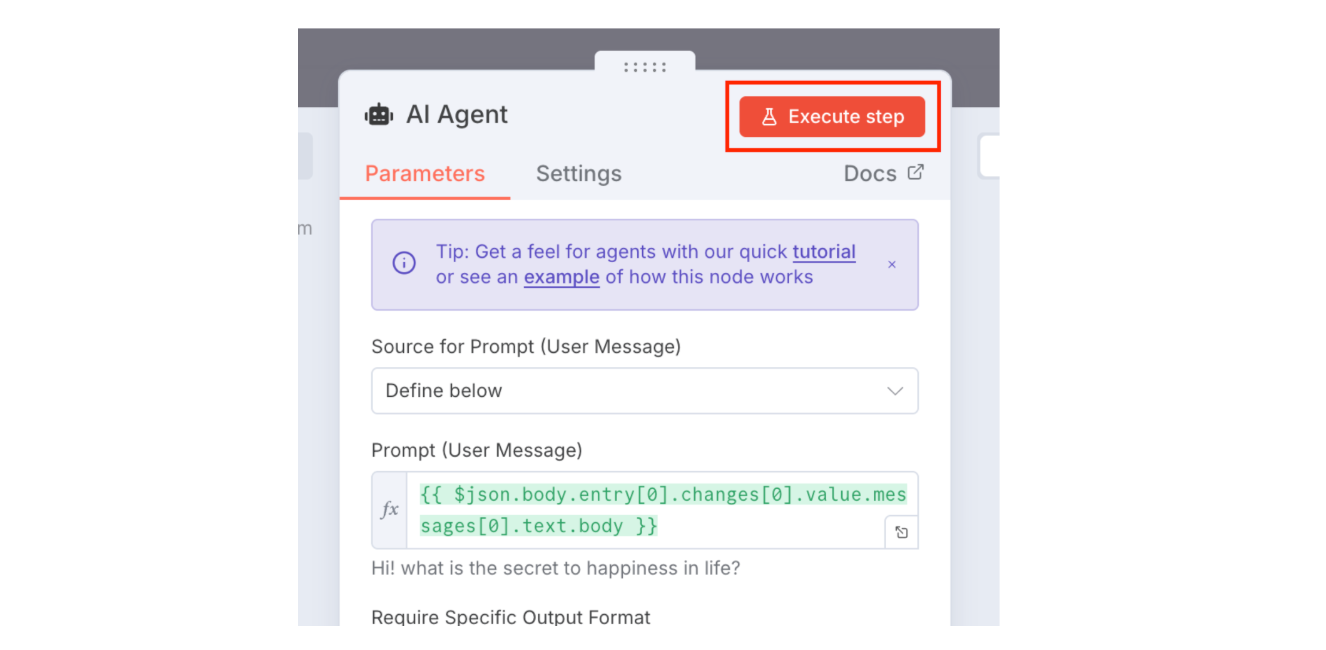
2.3 The AI Agent node configuration page should be open now
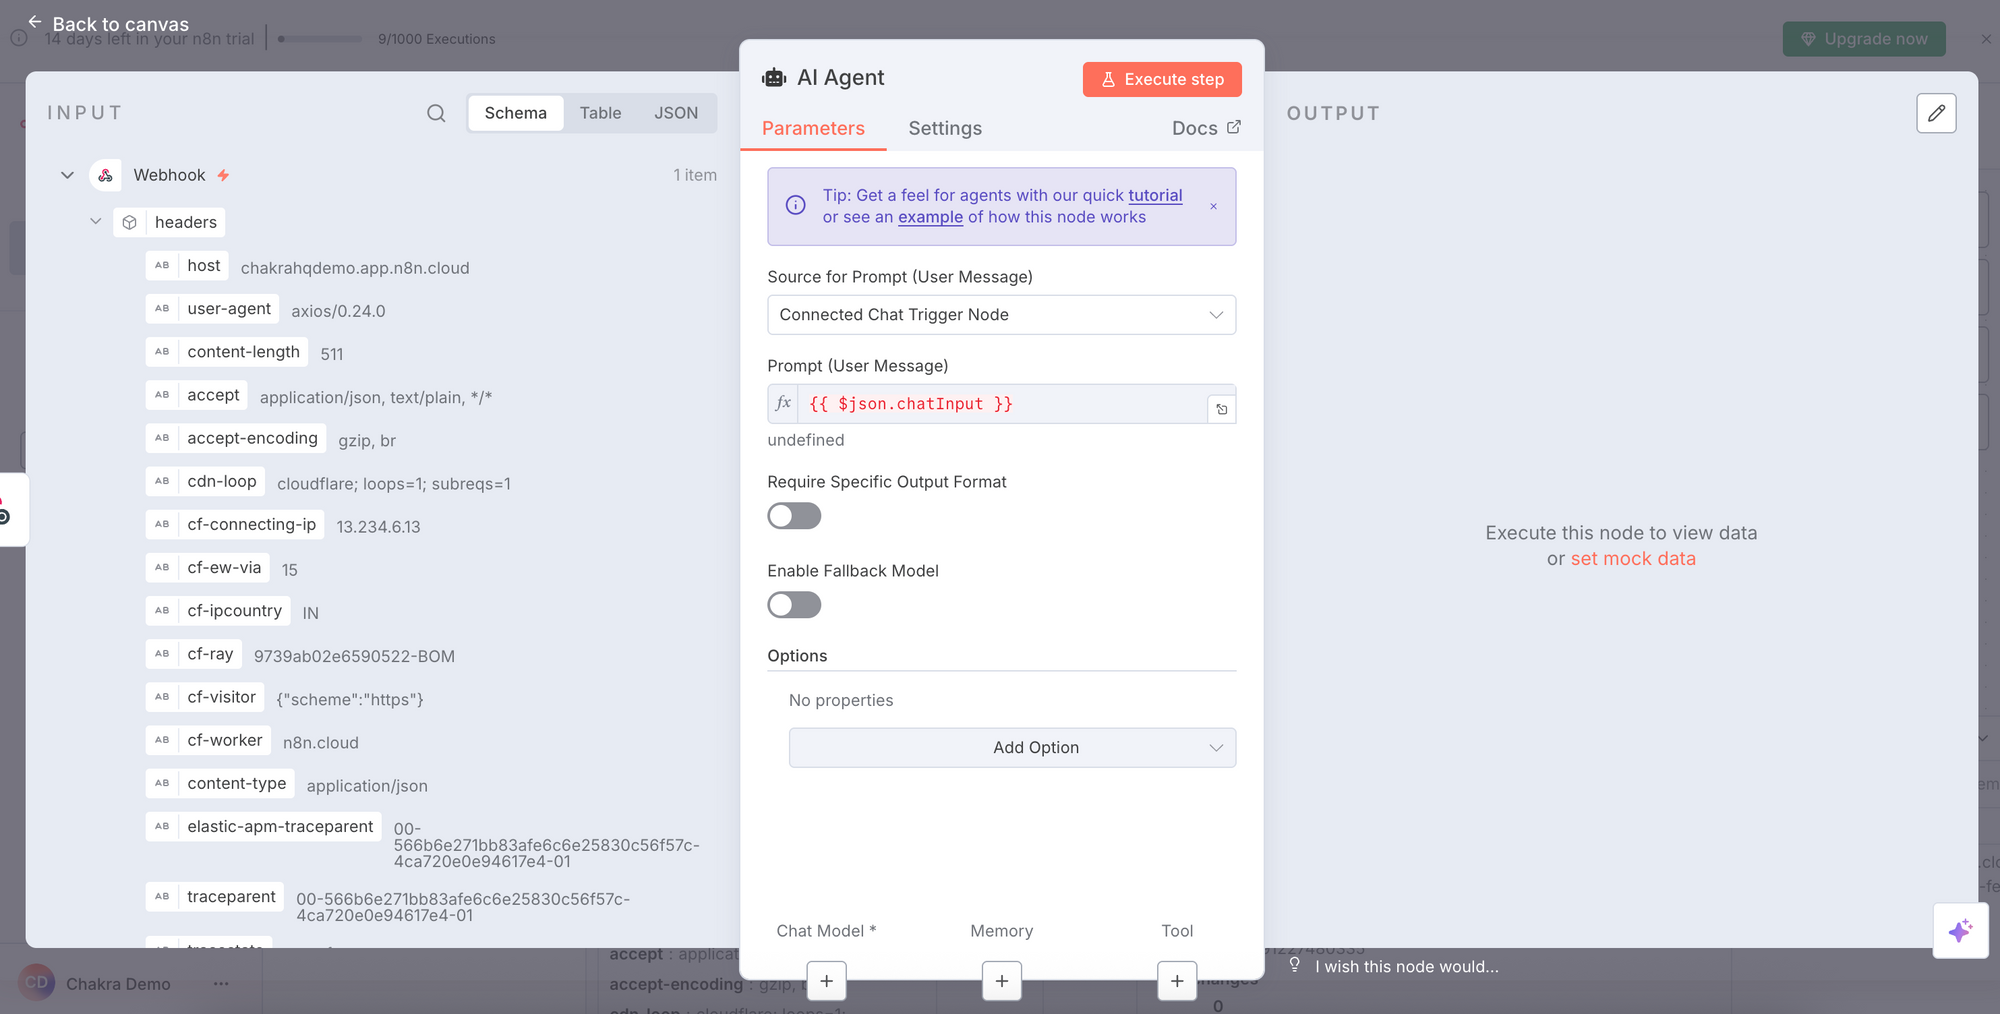
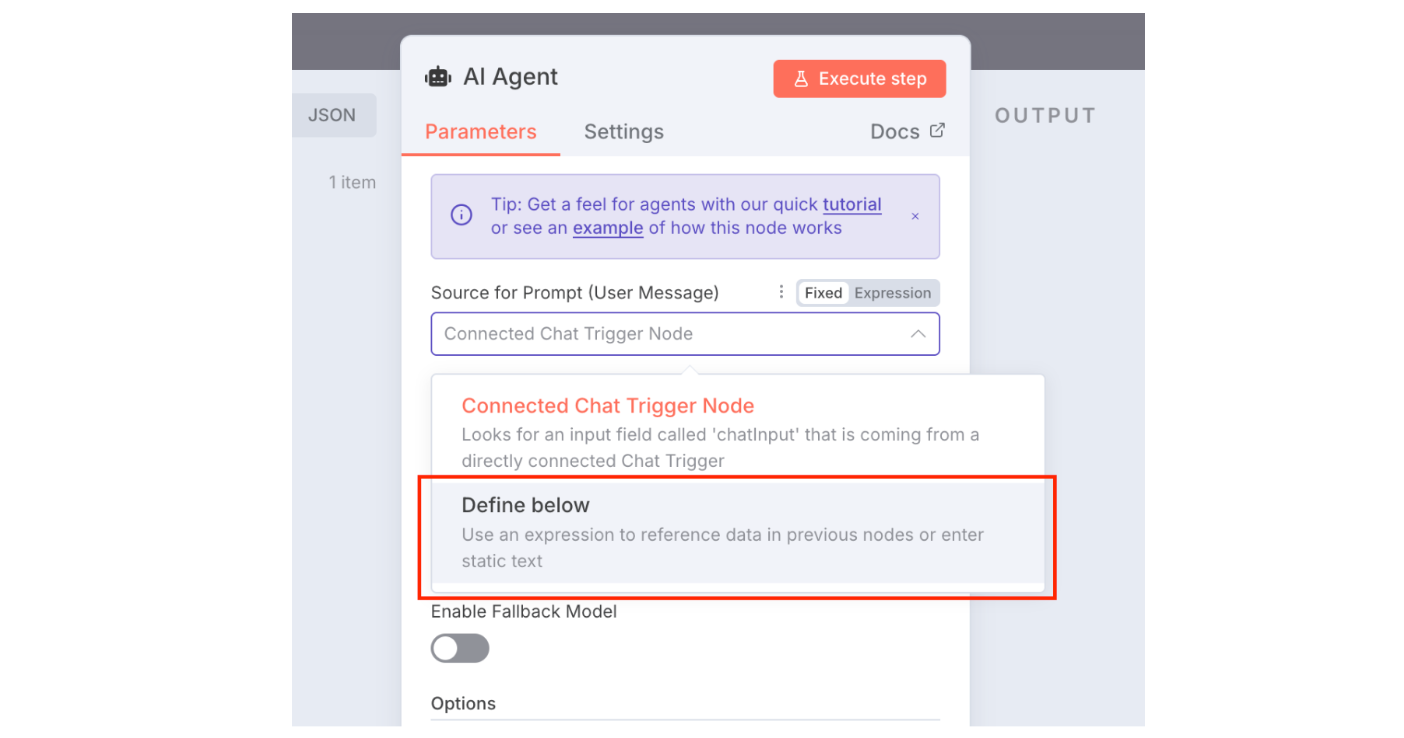
2.4 Click the dropdown for "Source for Prompt (User Message). It is configured by default to chat Input, but we need to connect it to the webhook trigger input. So, click the "Define below" option
2.5 The left-hand side Input tab shows the entire JSON object sent via the webhook. Locate the message you sent from the left-hand side input, click and drag it to the Prompt textbox.
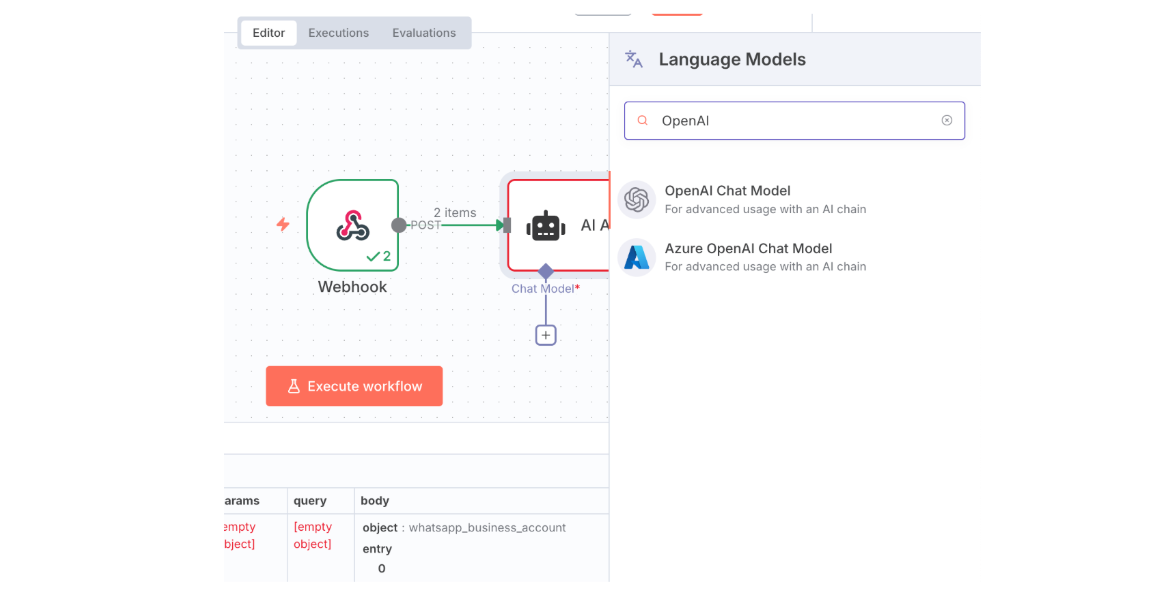
2.6 Now, let's configure the chat model. Click the Plus button under the "Chat Model" option at the bottom of the page
2.7 A sub-menu should open from the right with a list of available AI Models. Search for OpenAI and click to select the same.
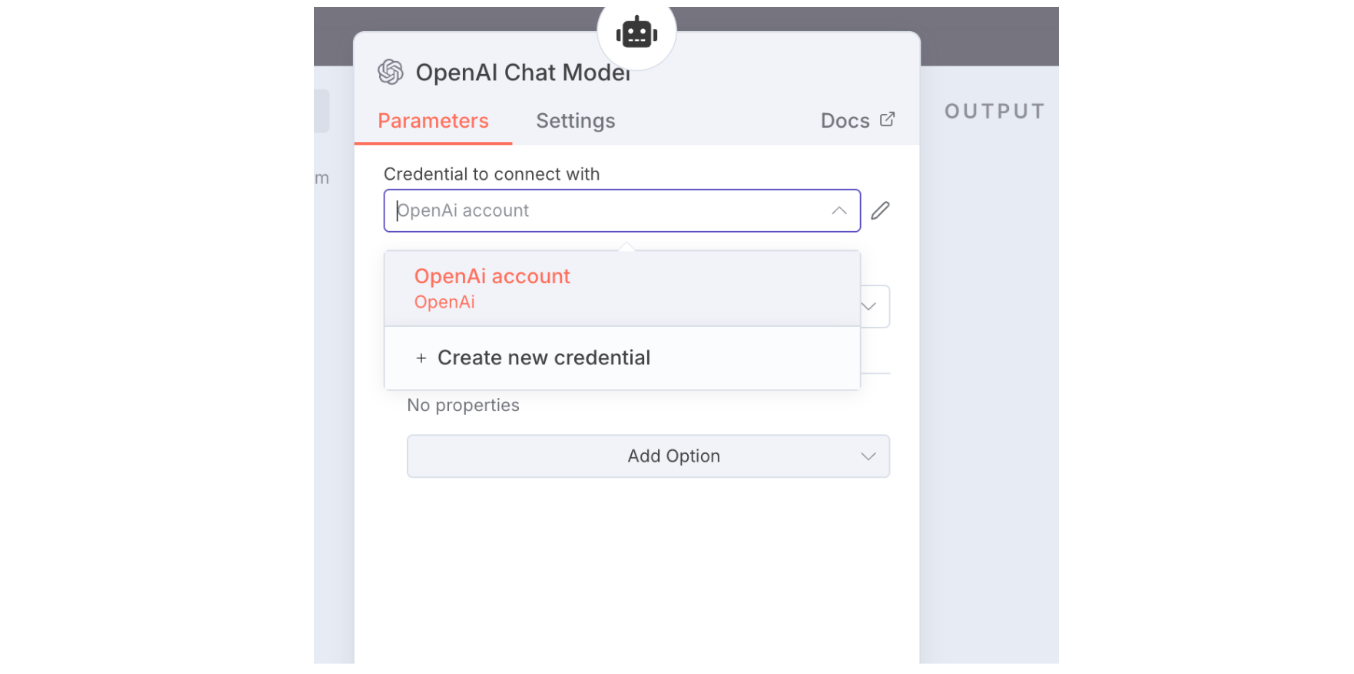
2.8 The OpenAI sub-node configuration page should be open now. Here, we need to configure the OpenAI Credentials. If it is already available, then select the same, or click create new credentials and provide an OpenAI API Key.
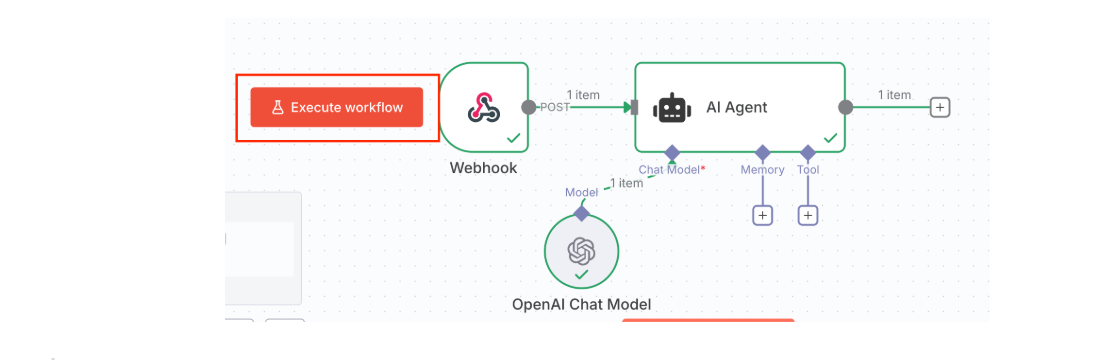
2.9 We can now go back to the canvas page by clicking "Go back to canvas" and clicking "Execute Workflow" to test our setup so far. This will make the workflow start listening to events on the test webhook.
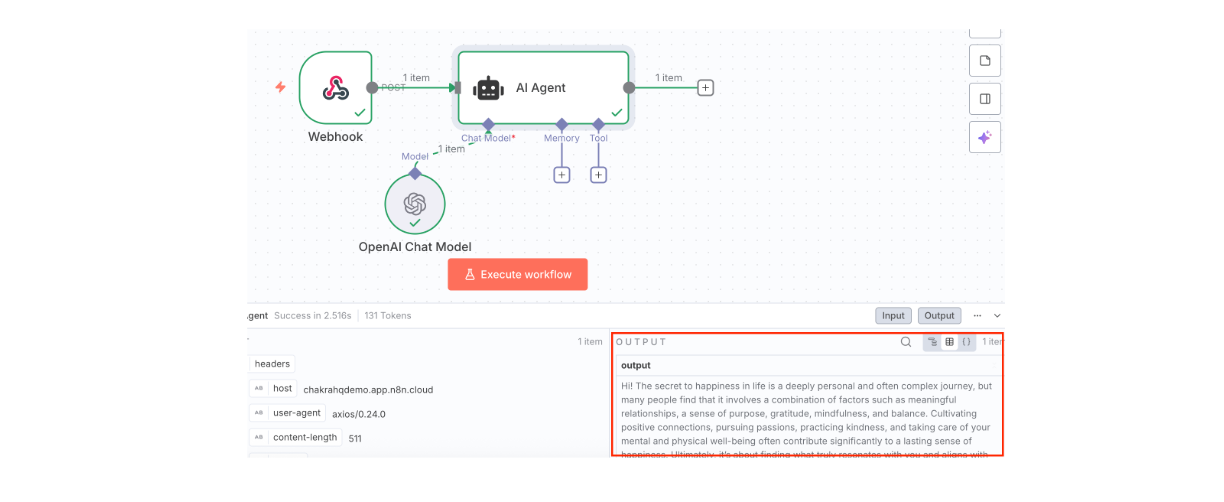
2.10 So open your end-user WhatsApp account and send a message to your Connected WhatsApp number. You will not receive a reply, but you should see the logs of the OpenAI response in the AI Agent node. The AI Agent node should also be bordered with a green color, indicating a successful run
If you don't see a successful run, then review your setup by going through the previous steps again.
3. Send the AI response back to the user
Now that our AI Agent can respond ot incoming chat queries, let's start sending them back on WhatsApp
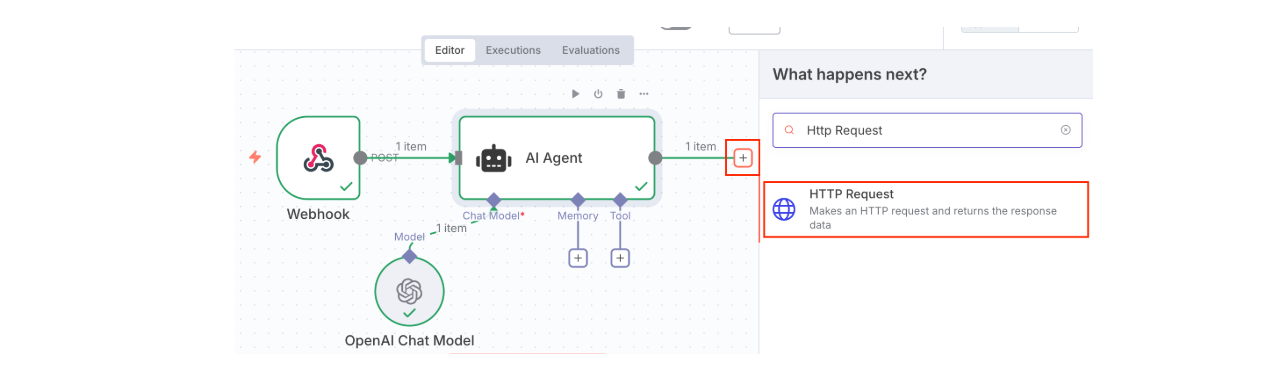
3.1 In the n8n workflow editor, click the + button to the right of the AI Agent Node. This will open the node selector menu. In the search bar, type "HTTP request" and click the HTTP Request node type.
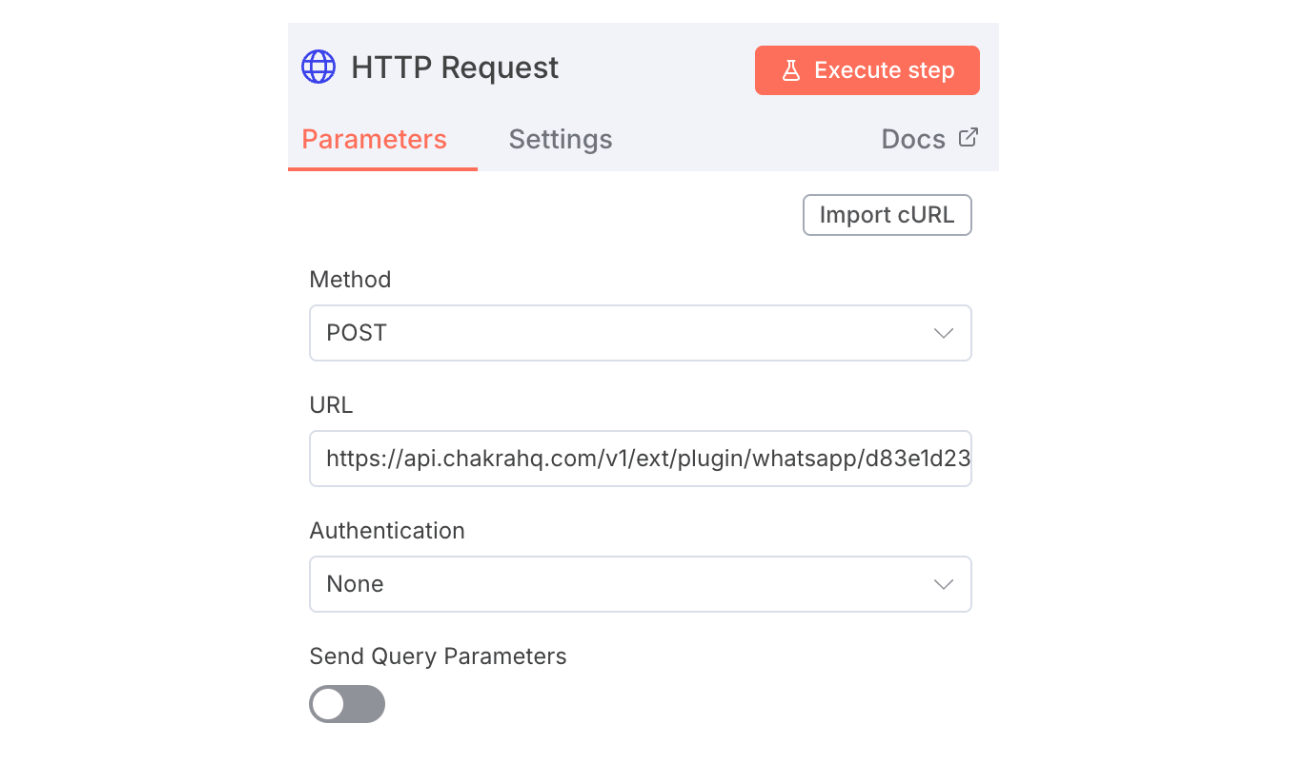
3.2 Configure the HTTP Request node to send a message via the WhatsApp send message API.
Details about this API can be found in the API Documentation. The config should look something like below
- Method: POST
URL: https://api.chakrahq.com/v1/ext/plugin/whatsapp/{{chakraPluginId}}/api/v22.0/{{whatsappPhoneNumberId}}/messages
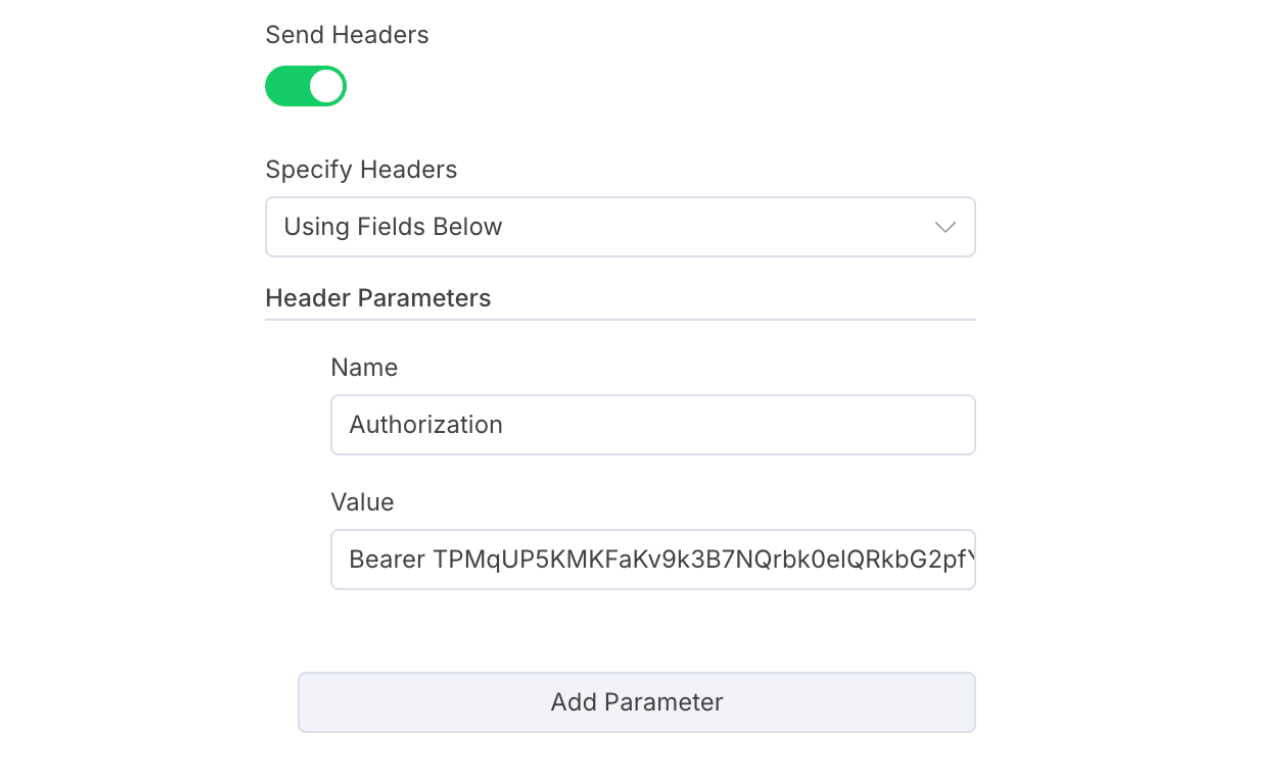
- Headers:
Authorization: Bearer {{chakraAccessToken}}
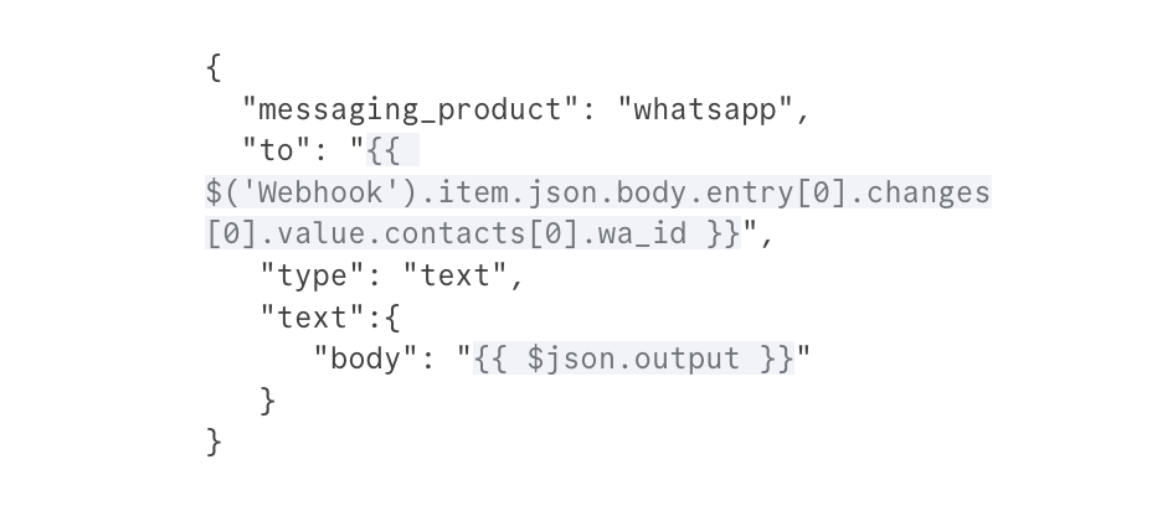
- Body: Should be of type json

- Body: The full JSON object should look like this
The required inputs for configuring the above API can be found in your Chakra Chat account. Following is a brief description of the same
How to figure out the chakraPluginId
In the Chakra Chat - WhatsApp setup page, locate the 3 dots icon next to the save button, on the top right cornerClick the same and click the "Copy Plugin Id" button. The plugin ID is now copied. You can paste it where you need it
How to figure out the WhatsAppPhoneNumberId
In the Chakra Chat - WhatsApp Setup page, click on the Gear icon next to "📞 WhatsApp Phone Number. s"In the drawer that opens, you will find the Meta ID of each phone number in the phone number column
How to get a chakraAccessToken
To be able to use Chakra APIs, first, you need to create an API Key for your use case from the Chakra Chat - API Keys section.
Create An API Key
To create an API Key, you need to provide the following information:
- Name - Name of the key. Please use a meaningful name. This makes management of keys easier.
- Description (optional) - Description for the api keys Access
- Role - Choose a
roleFor the new API Key, the API Key will inherit and be limited by the privileges supplied by the assigned role. Ensure that publicly exposed API keys have the least privileged role needed to accomplish the task.
After creating an API Key, you will find the chakraAccessToken under the "Access Tokens" section of the created API Key.
3.3 After configuring the HTTP Request. Go back to the Canvas and click the execute step button above the HTTP Request node. If everything is configured correctly, the node should execute the step correctly, and you should receive the test OpenAI output for the end user WhatsApp account 🥳
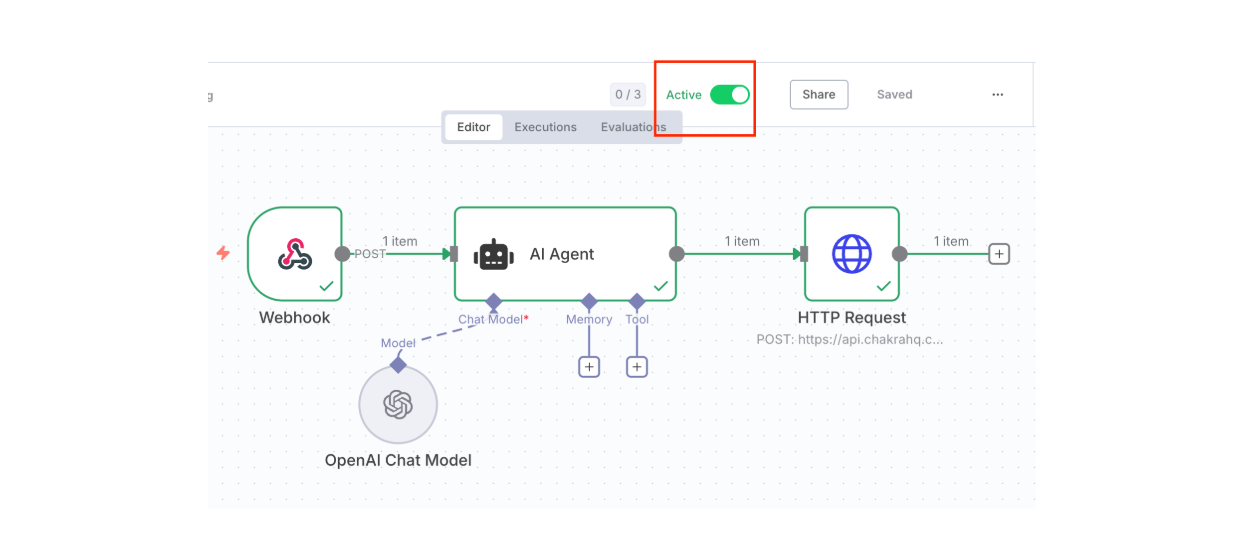
4. Publish your workflow
4.1 Save your workflow and mark it as active
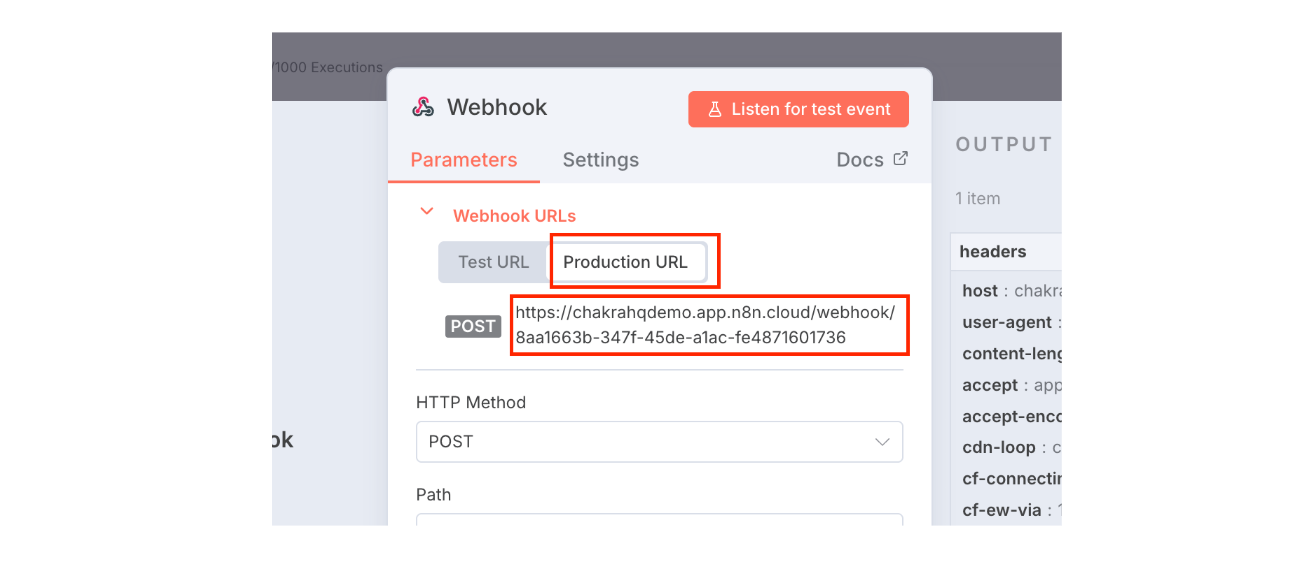
4.2 Double-click the webhook, and click Production URL under webhook URLs. Then, click the actual URL to copy it
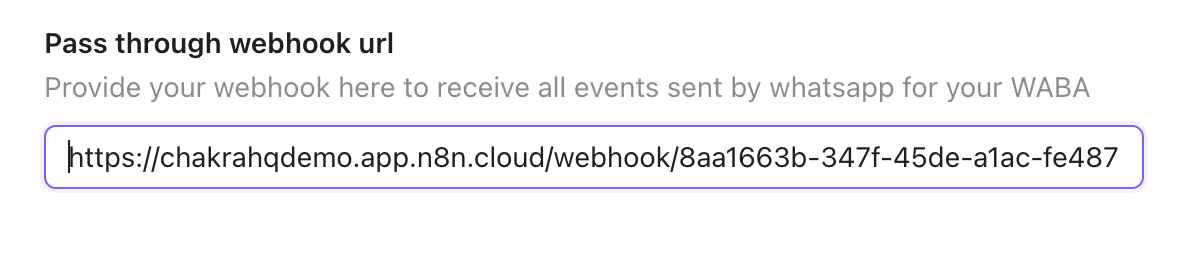
4.3 Now open your Chakra Chat account and go to the WhatsApp Setup page. Then click the more tab. Paste the copied webhook URL into the input box under "pass through webhook URL."
4.4 Click Save from the top right corner of the page to save this configuration. Now, WhatsApp events will be sent to the production webhook URL.
Conclusion
That's it! You can now test your bot and then modify the agent to solve more complex use cases. The AI agent described above is quite basic. For practical use cases, you will need to add other things like memory or image processing. But the basic principle remains the same
Appendix
A. Add an if condition to filter out non-message events
The pass-through webhook will usually receive many events from WhatsApp, some of them are message events, others might be status events or billing events. Ideally, you would want to add an if condition node after your Webhook node to filter out non-message events.
After you do the above, be careful to change the user prompt expression in the AI Agent node to select the webhook data correctly. It will now look something like this
{{ $('Webhook').item.json.body.entry[0].changes[0].value.messages[0].text.body }}
B. Using memory to keep track of a conversation
At some point, you will want to use memory to keep track of a conversation with a user. The message events also contain the phone number of your end user; this phone number serves as a great key to thread all the messages together
C. Accessing media sent by users
You might want to process images or documents sent by your users. In such a case, the WhatsApp webhook events will generally contain a WhatsApp Media ID. You can fetch the media associated with this ID by using the show media API